The Inventory Count module allows users to perform a physical inventory count and compare the quantities found physically with the quantities currently recorded in the system. This helps ensure that the inventory records accurately reflect the stock physically available and allows users to make the necessary inventory adjustments when differences are identified, verifying whether the quantities physically available match the quantities recorded in Smart 145.
Please note that this functionality must be enabled by the team. To request activation of the feature, please contact Support team at support@smart145.com
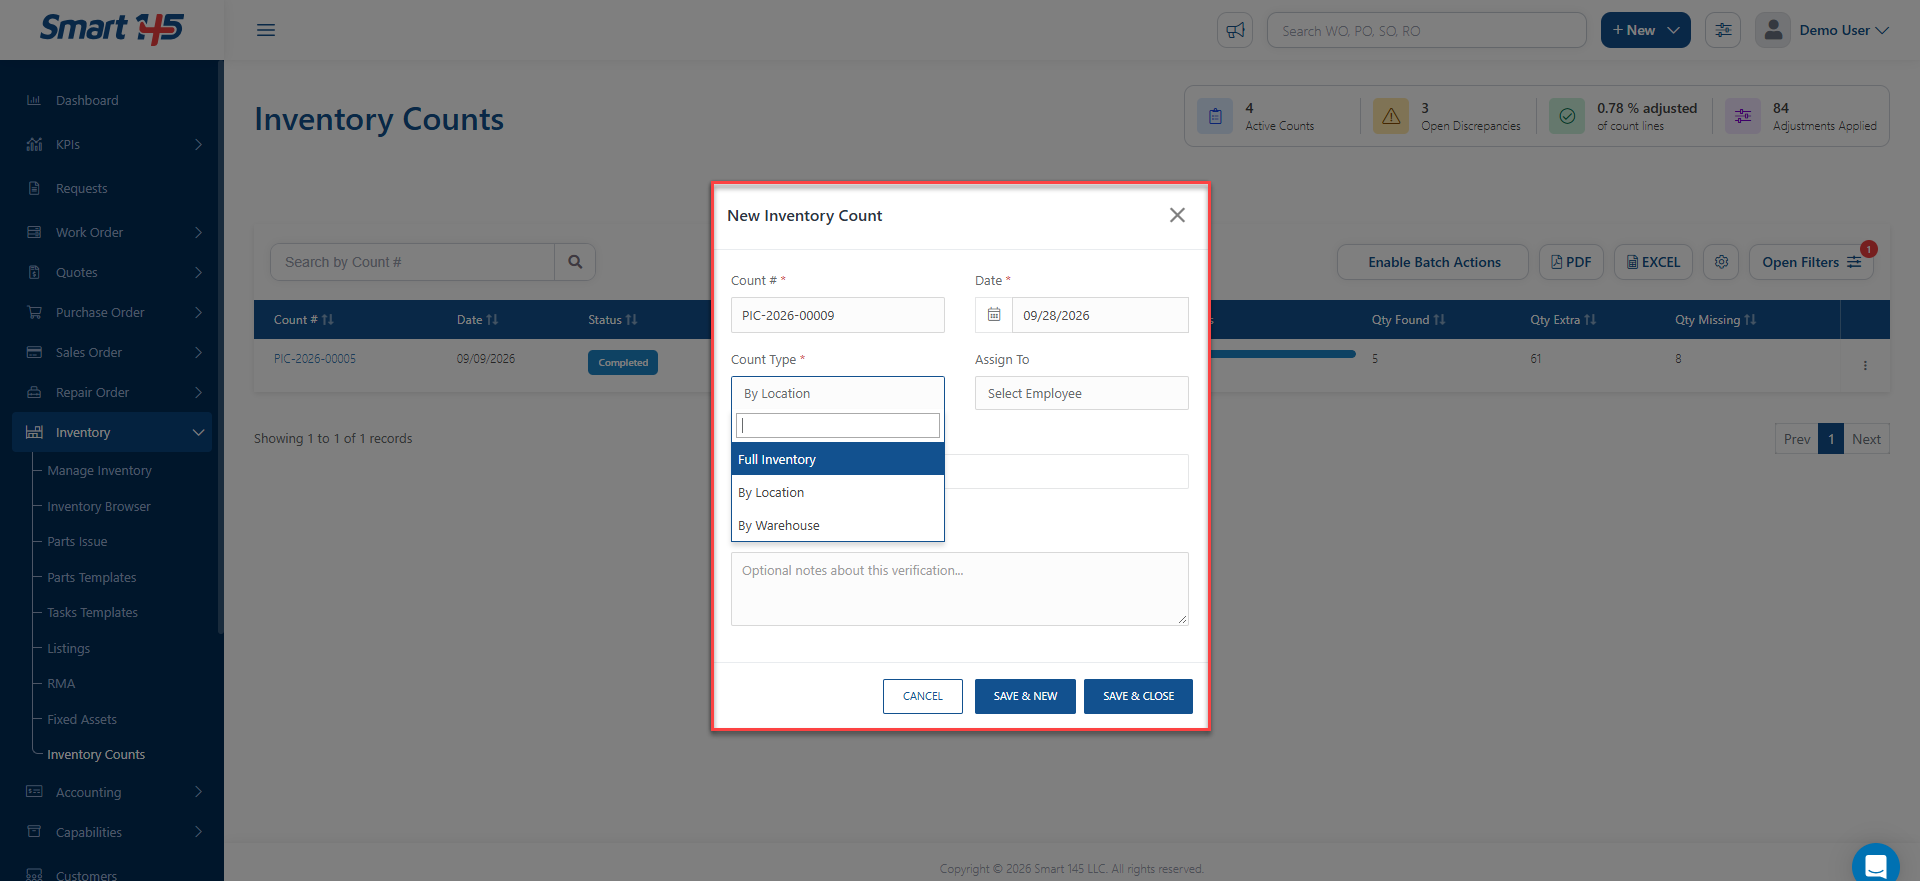
1- Creating an Inventory Count An Inventory Count can be created based on one of the following options:
Location: Includes the PNs associated with the selected location.
Warehouse: Includes the PNs associated with the selected warehouse.
Full Inventory: Includes all PNs currently available in inventory.
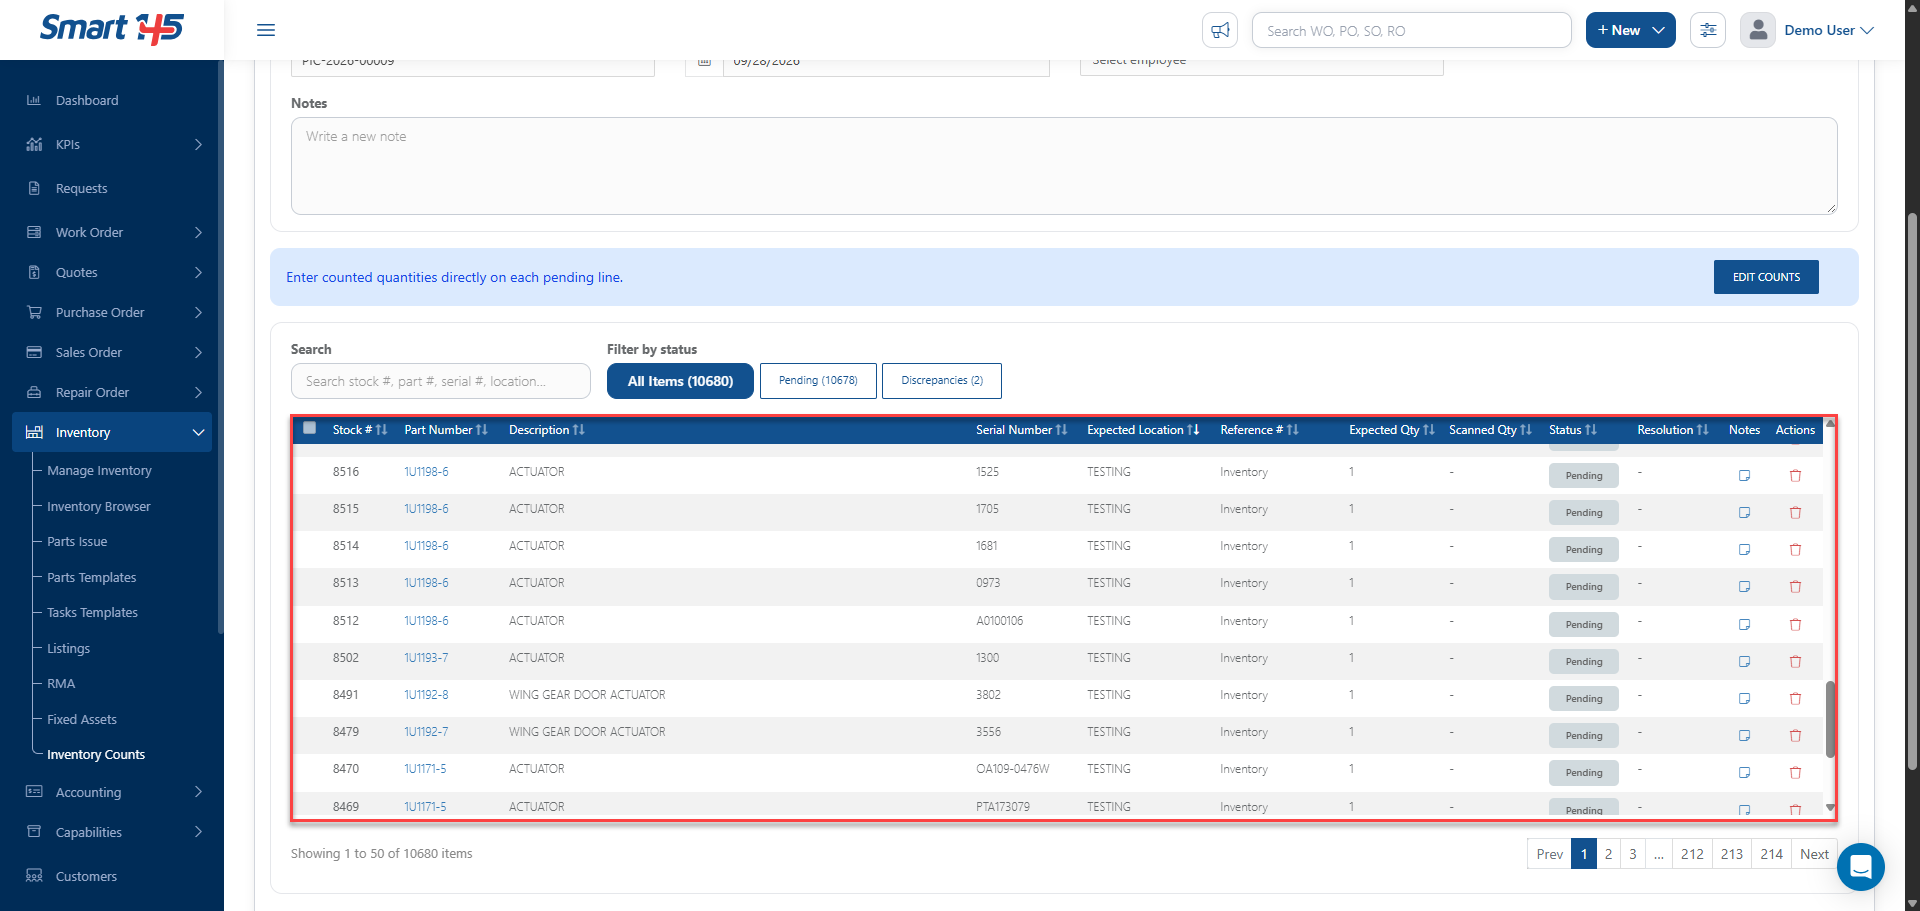
Once the Inventory Count is created, the system will automatically add the PNs that meet the selected criteria. 2- Entering Inventory Count Quantities Within the Inventory Count, users will see two main quantity fields:
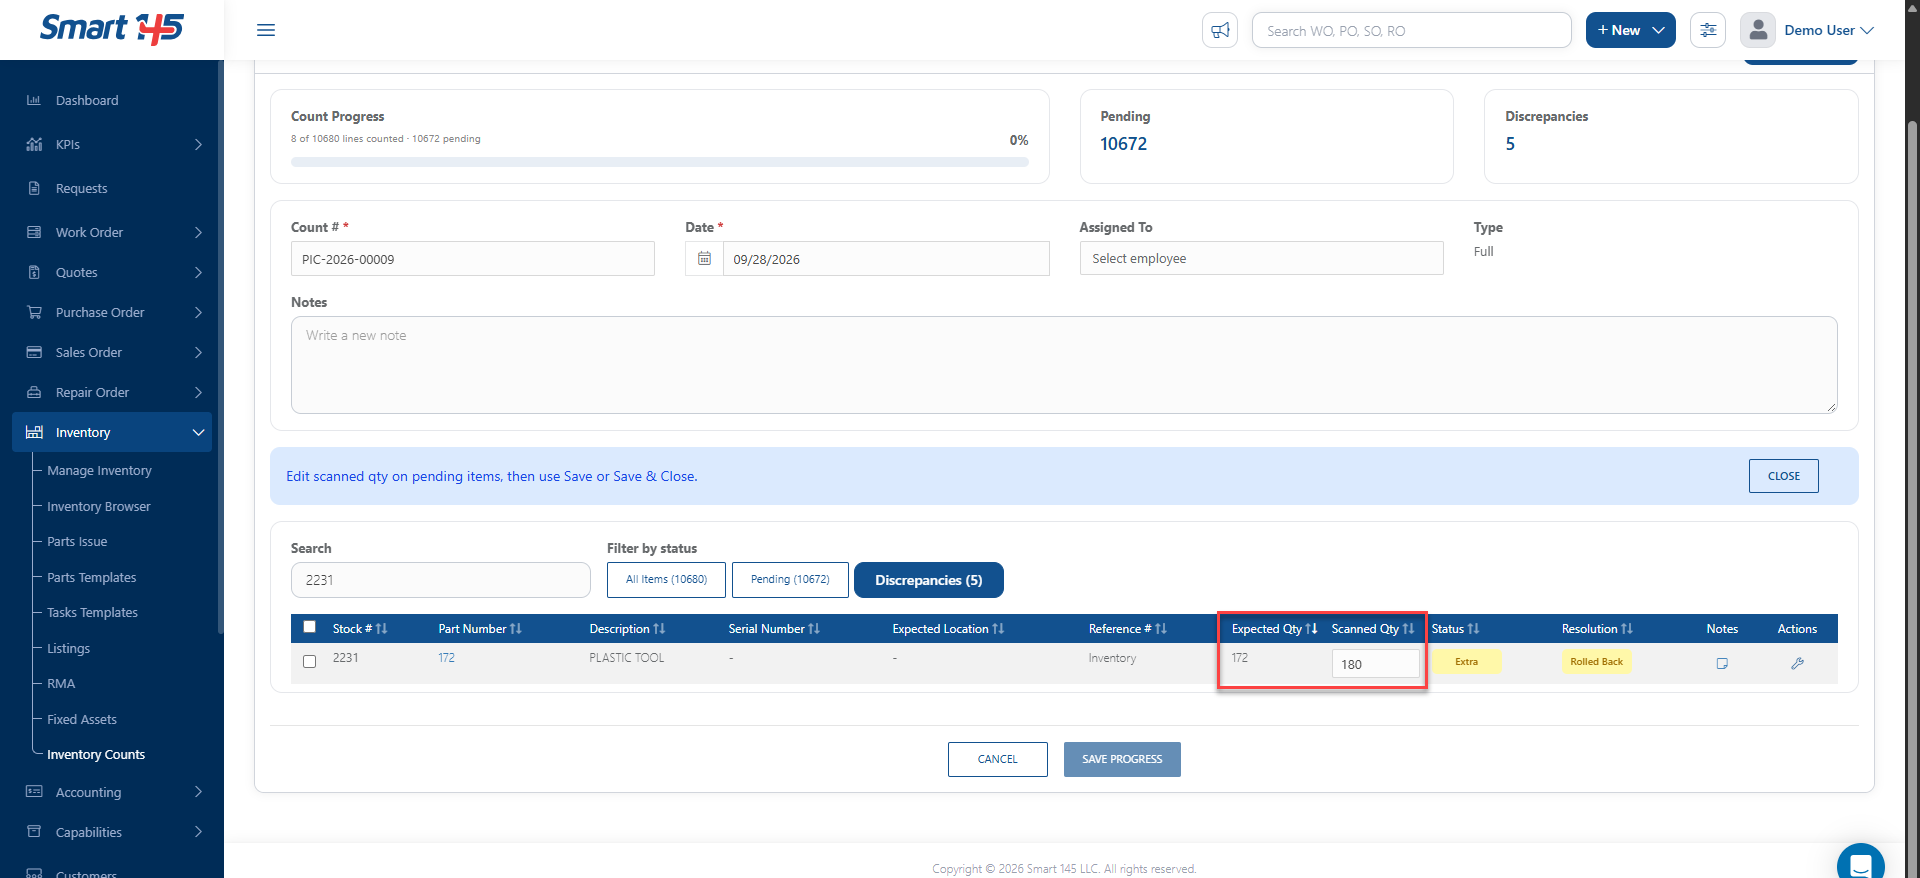
Expected Quantity: The Expected Quantity represents the quantity currently recorded in the system for the corresponding PN.
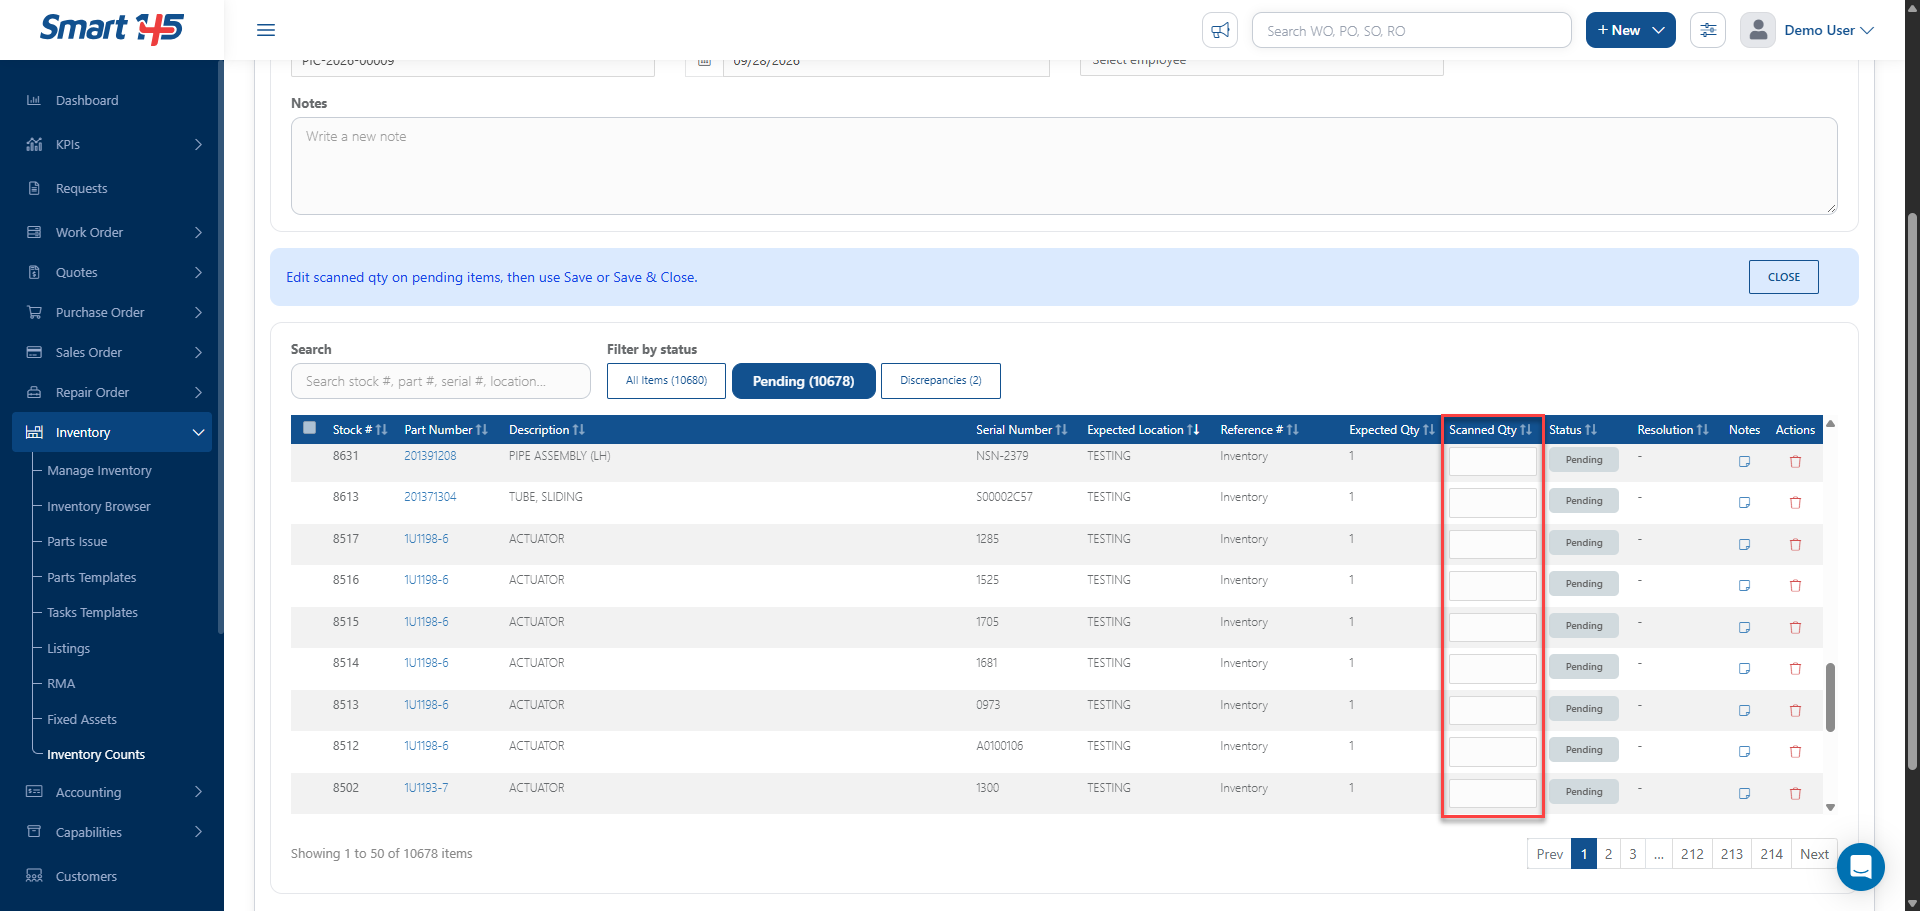
Scanned Quantity: The Scanned Quantity represents the quantity that was physically found during the inventory count.
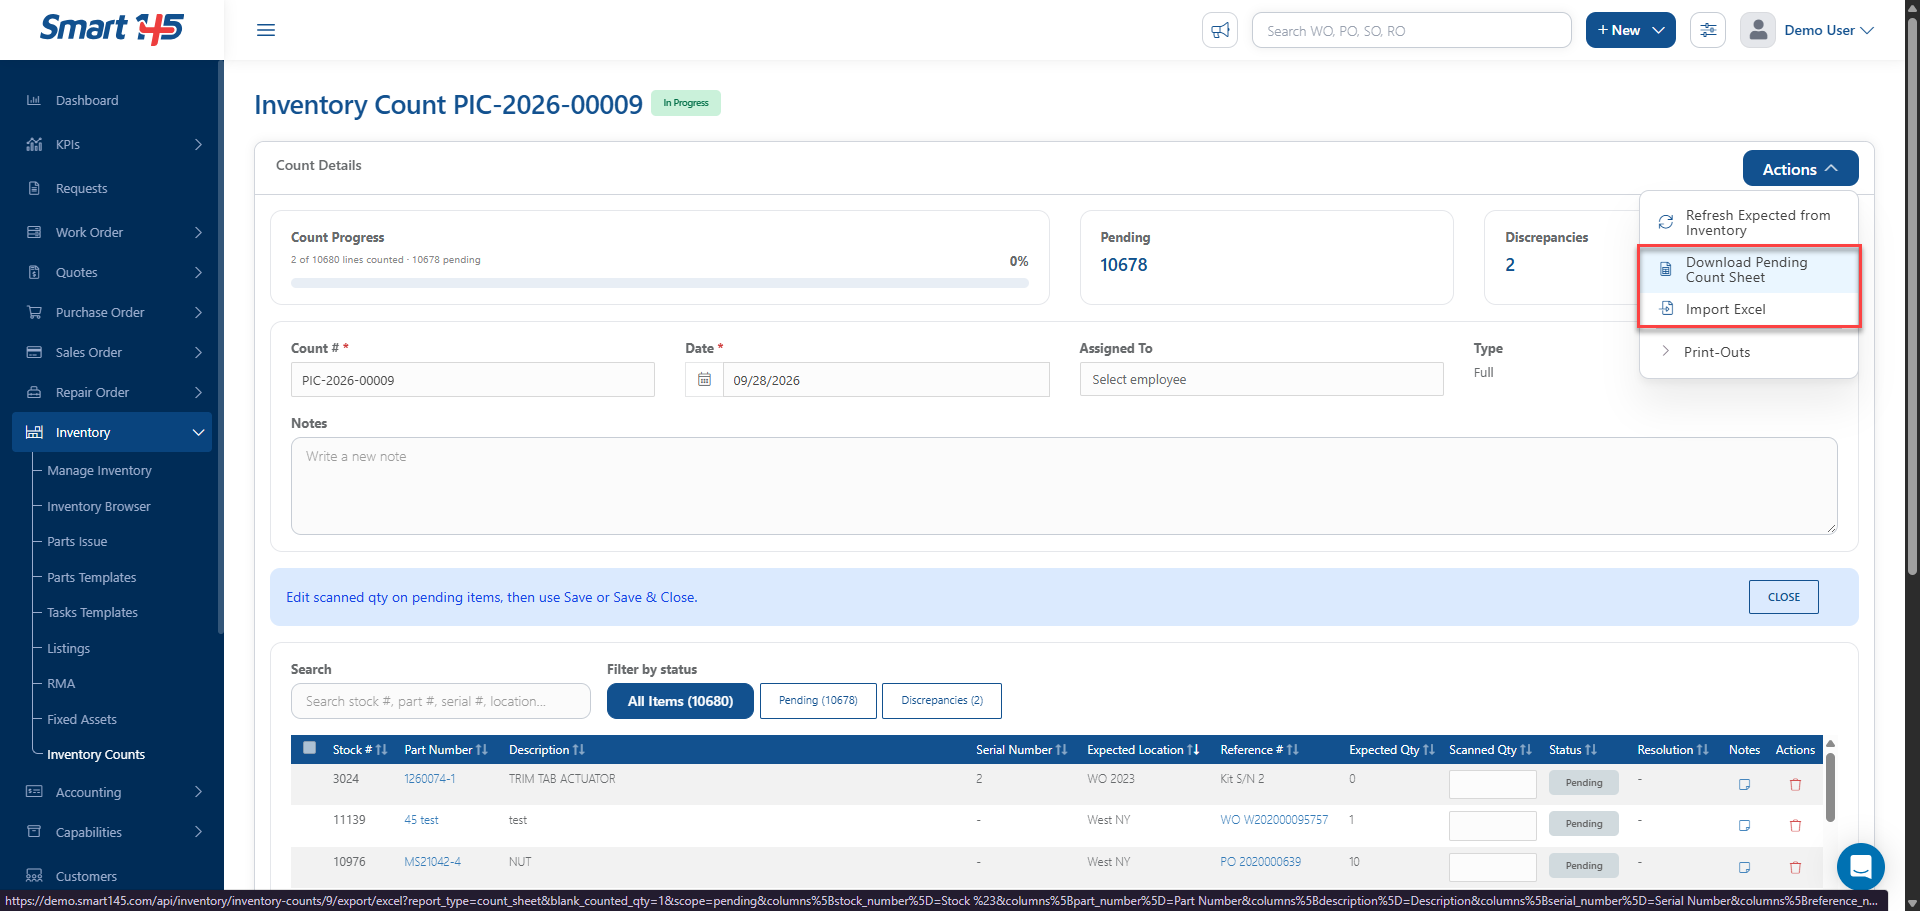
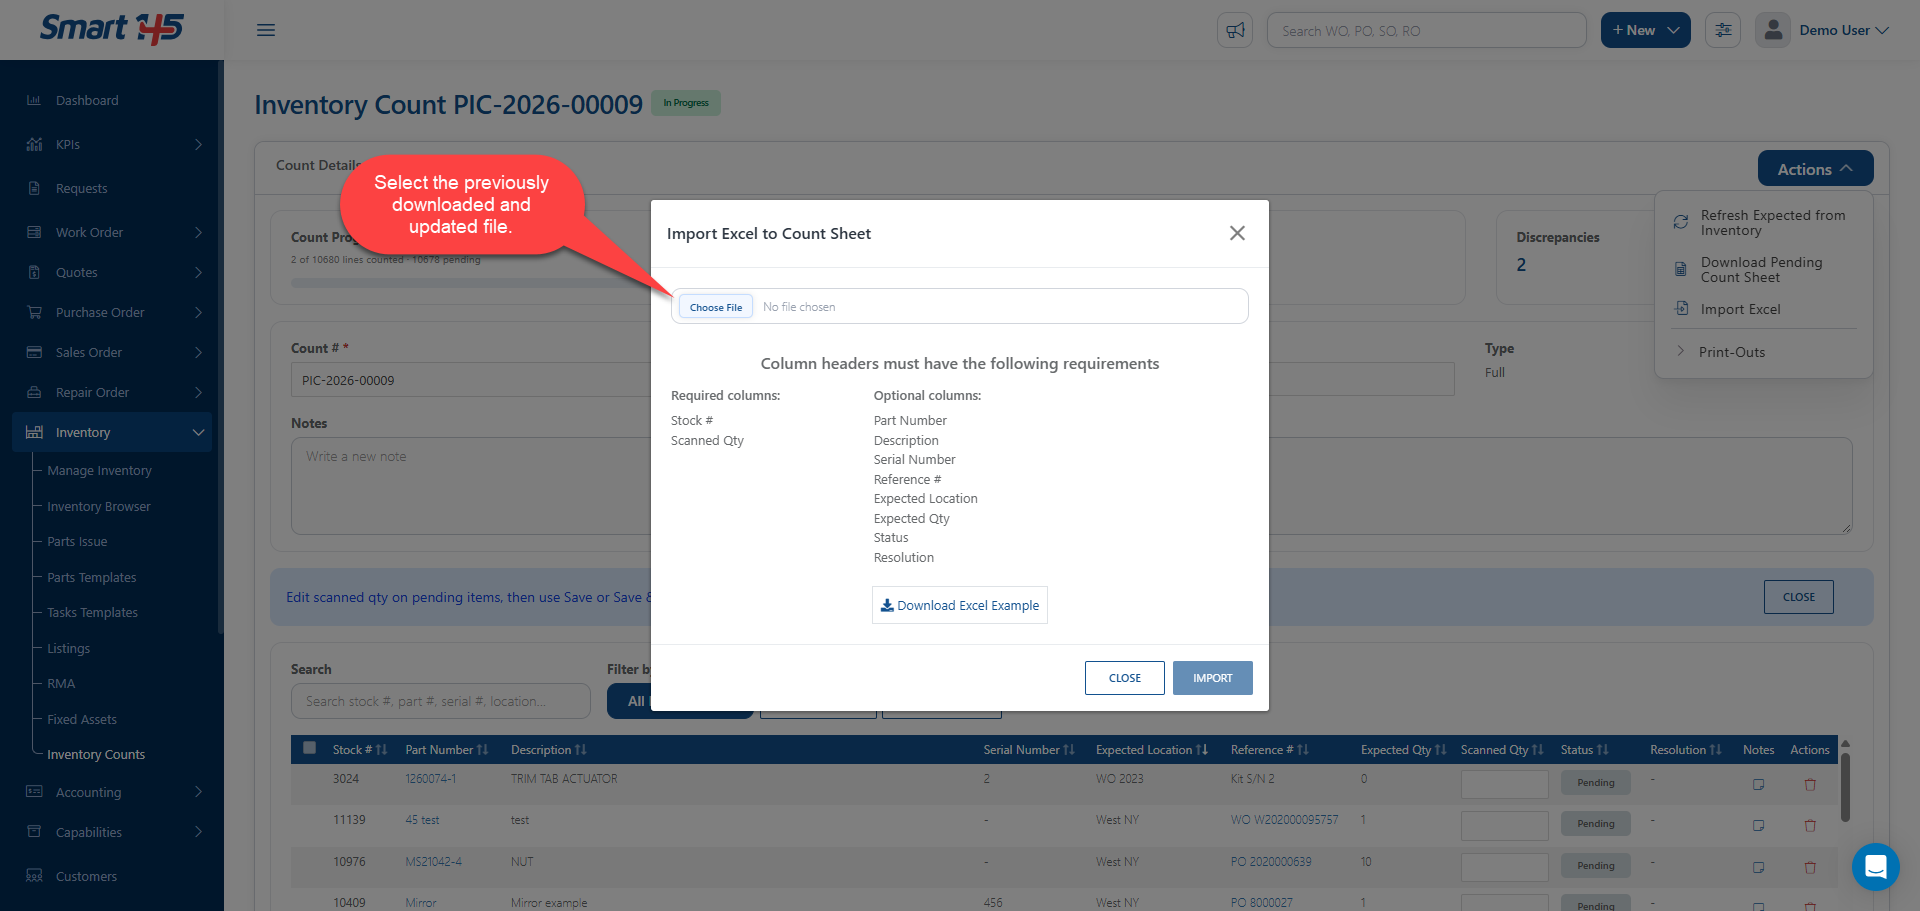
The Scanned Quantity can be entered using either of two available methods, depending on how the inventory count is being performed. Users can enter the quantity directly within the Inventory Count by entering the physically counted quantity for each PN individually. Alternatively, users can export the Inventory Count to an Excel file, enter the Scanned Qty for each PN in the file, and then import the completed file back into the system to update the inventory count.
The inventory count can also be completed in multiple stages. Users can enter scanned quantities for part of the inventory, save the count, and continue the process later.
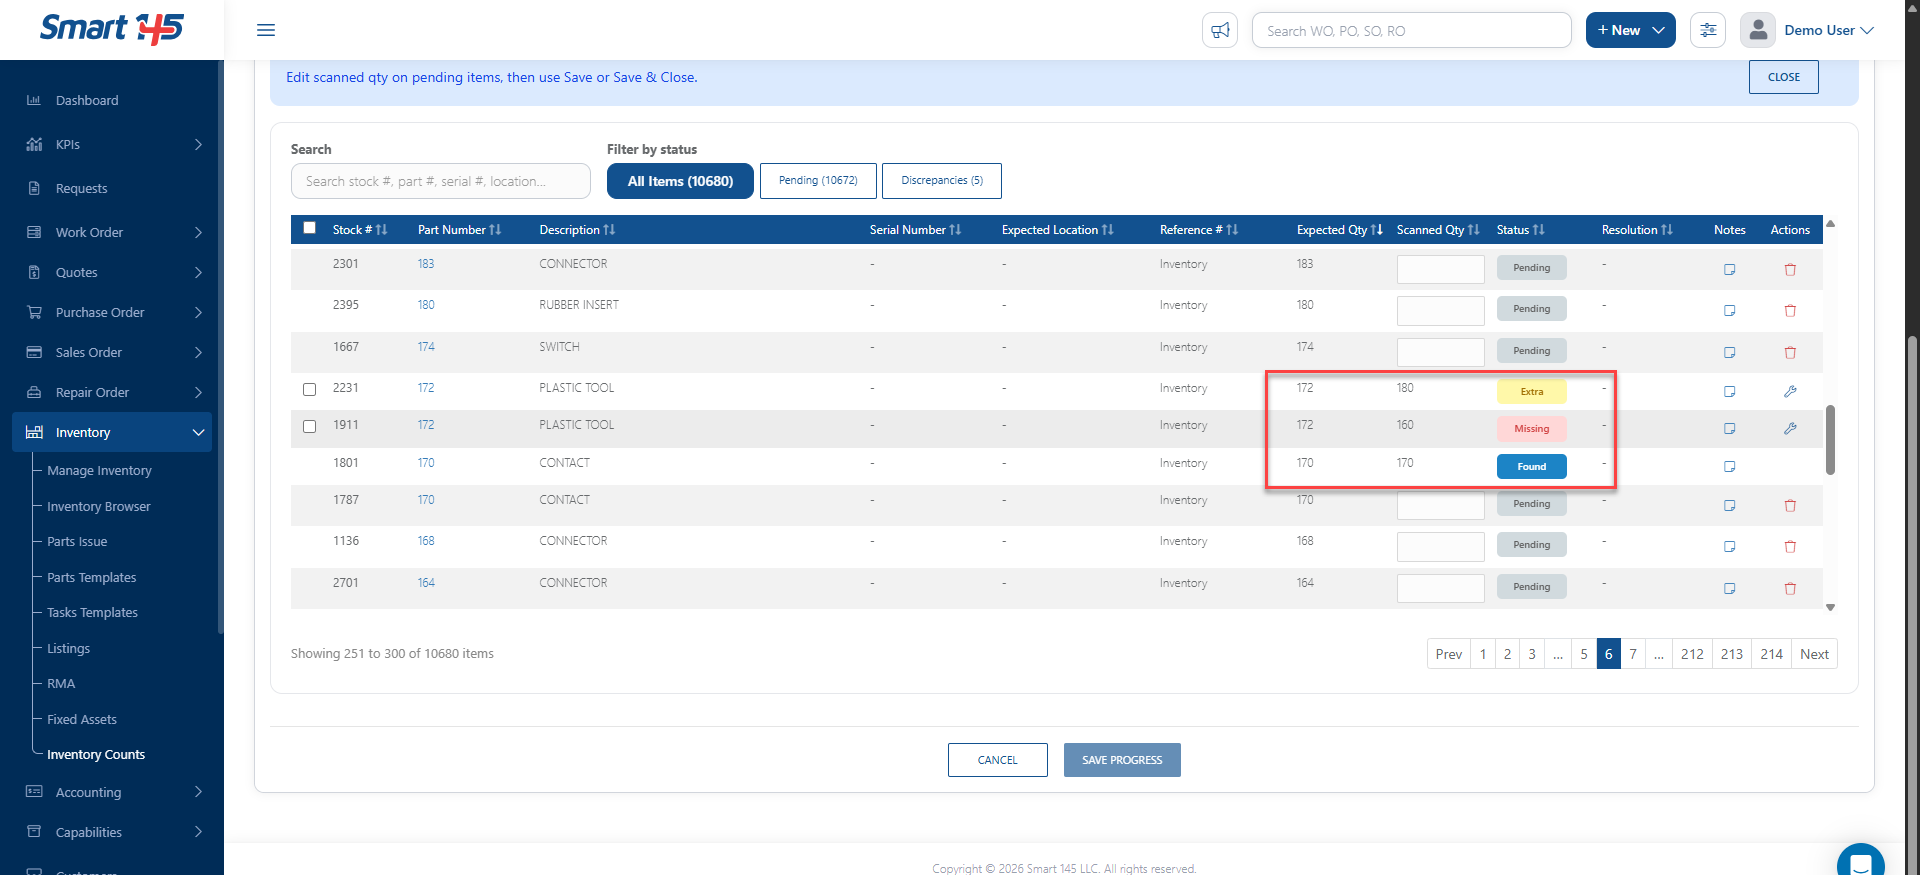
3- Comparing Expected and Scanned Quantities Once the Scanned Quantity has been entered, the system compares it with the Expected Quantity and identifies the result for each PN. They are categorized as follows:
Extra: The physical quantity is greater than the quantity recorded in the system.
Missing: The physical quantity is less than the quantity recorded in the system.
Found: The physical quantity matches the quantity recorded in the system.
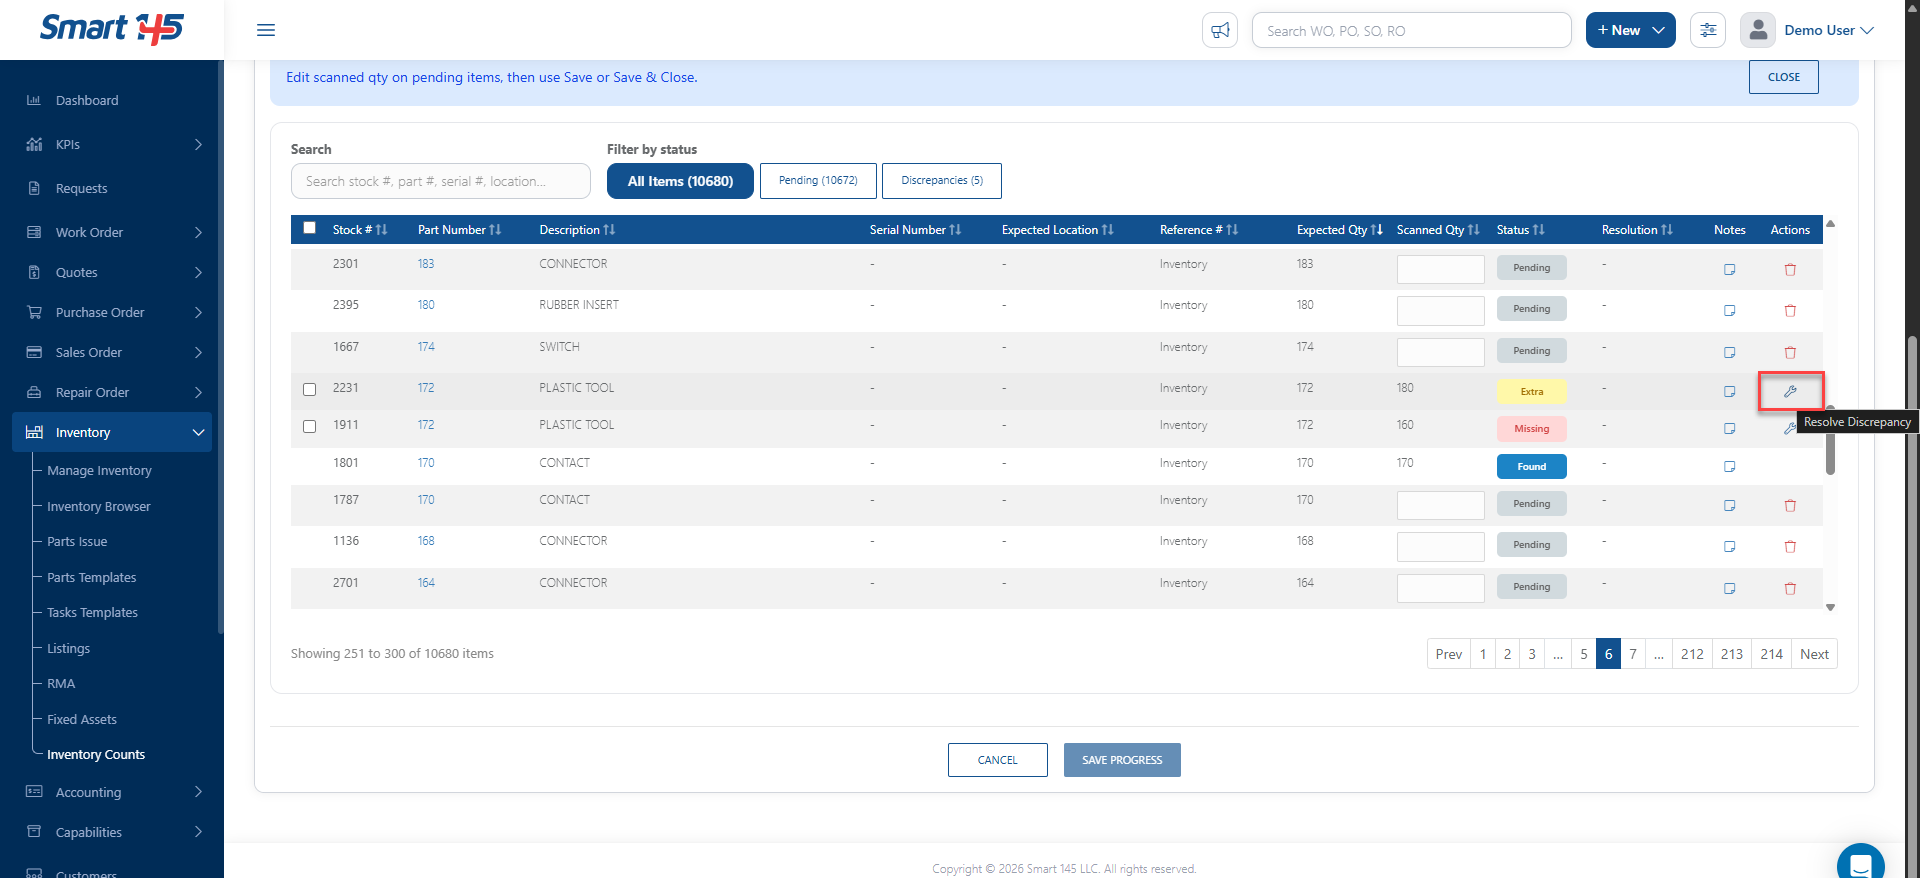
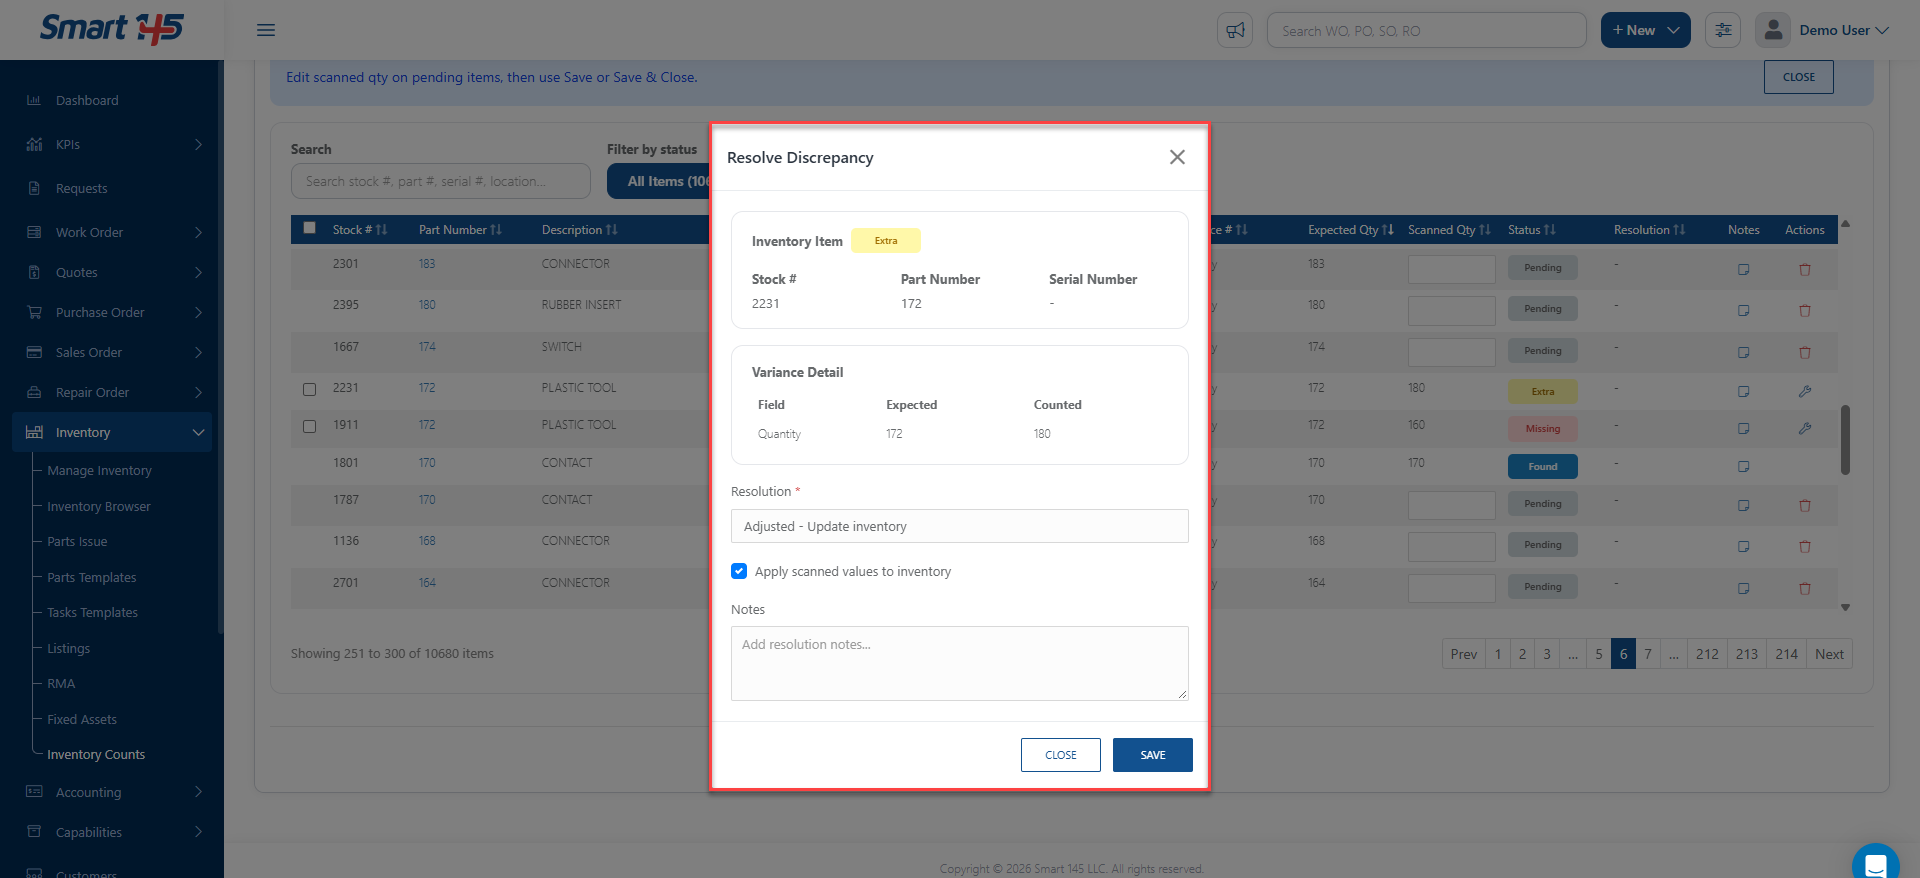
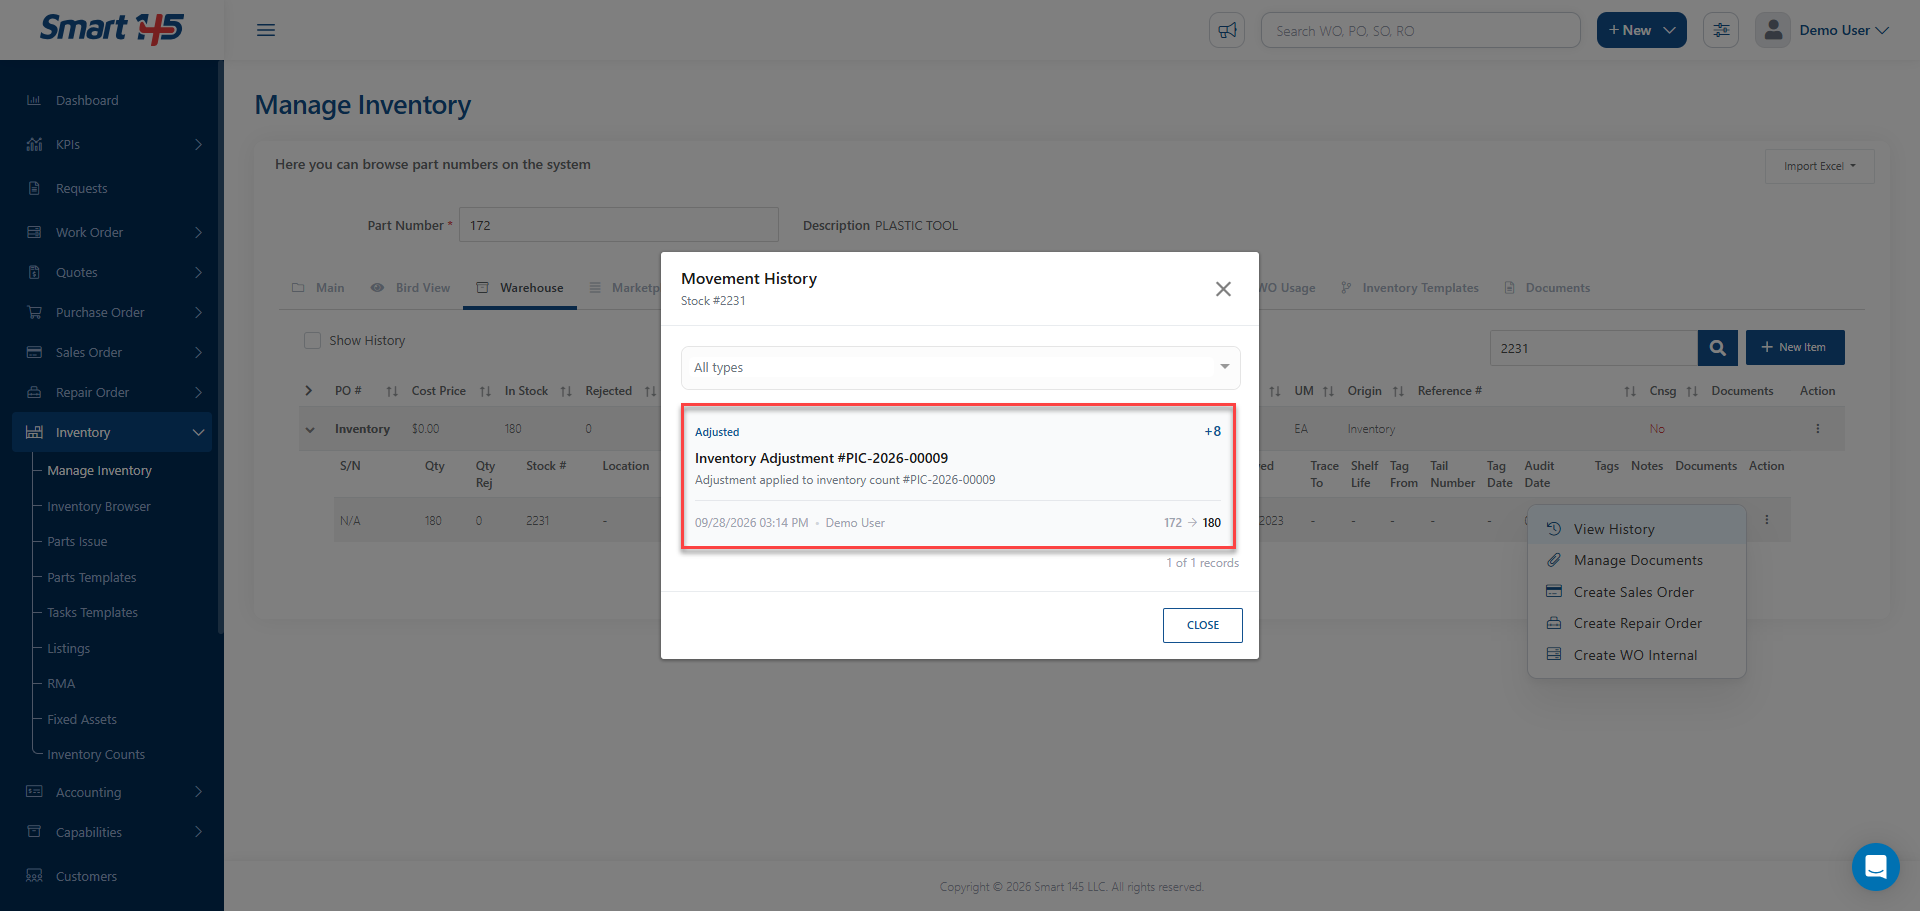
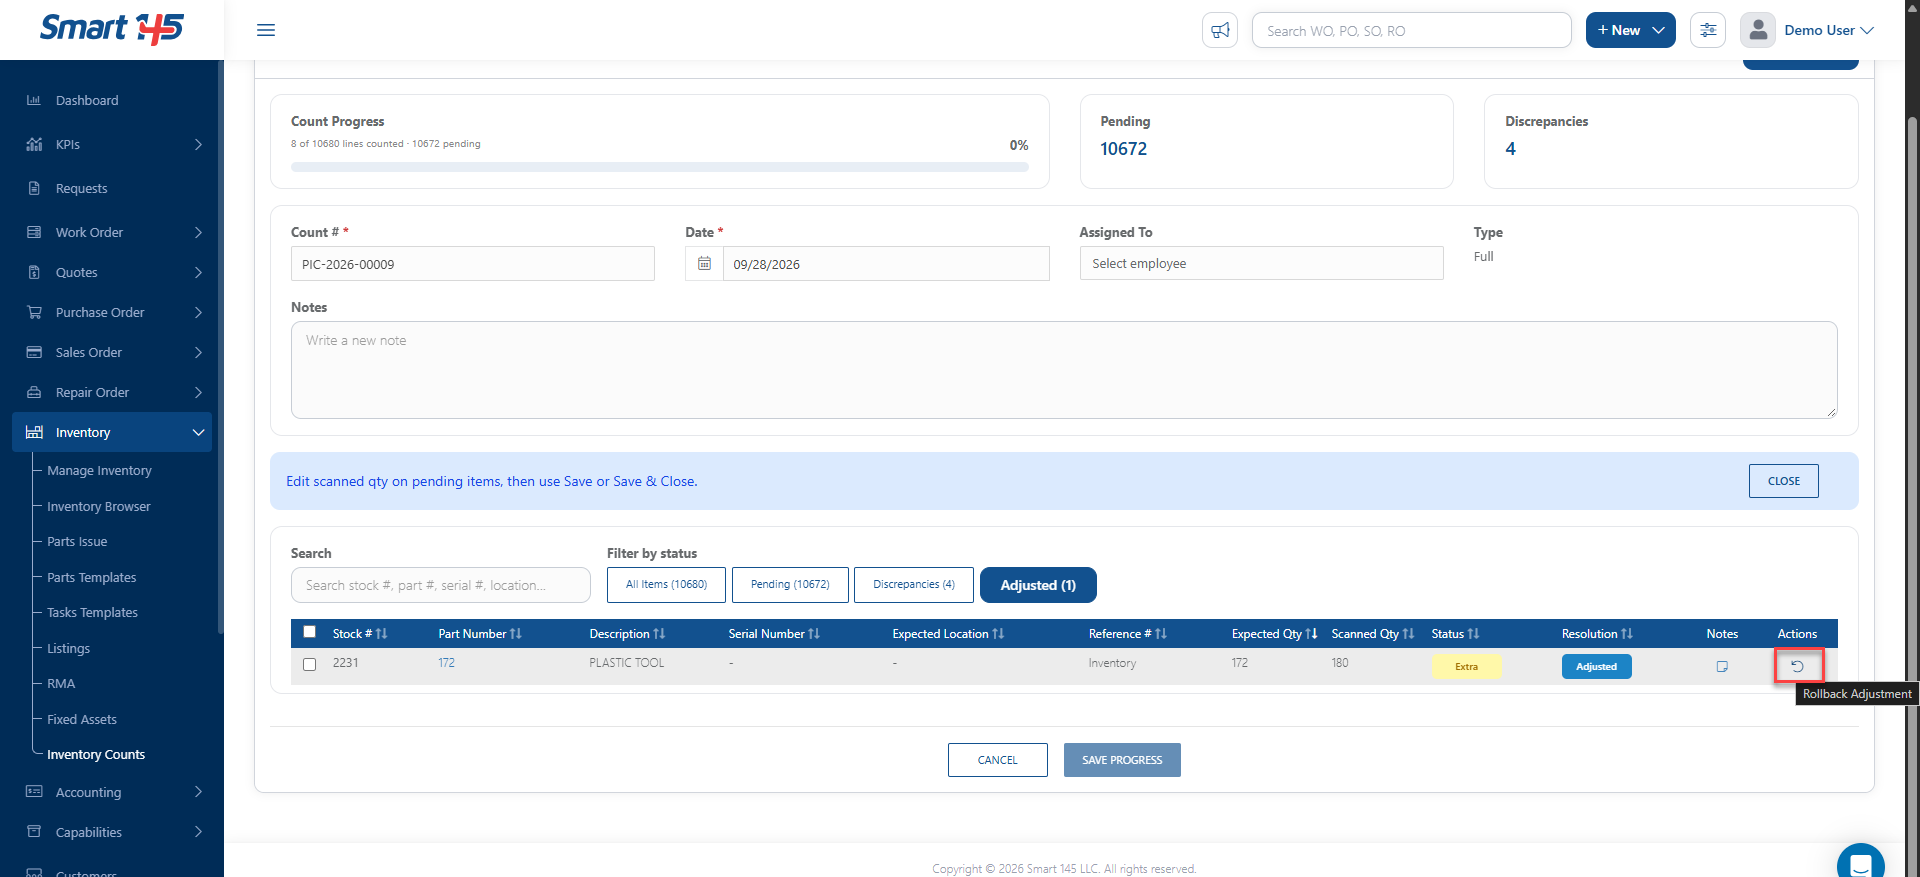
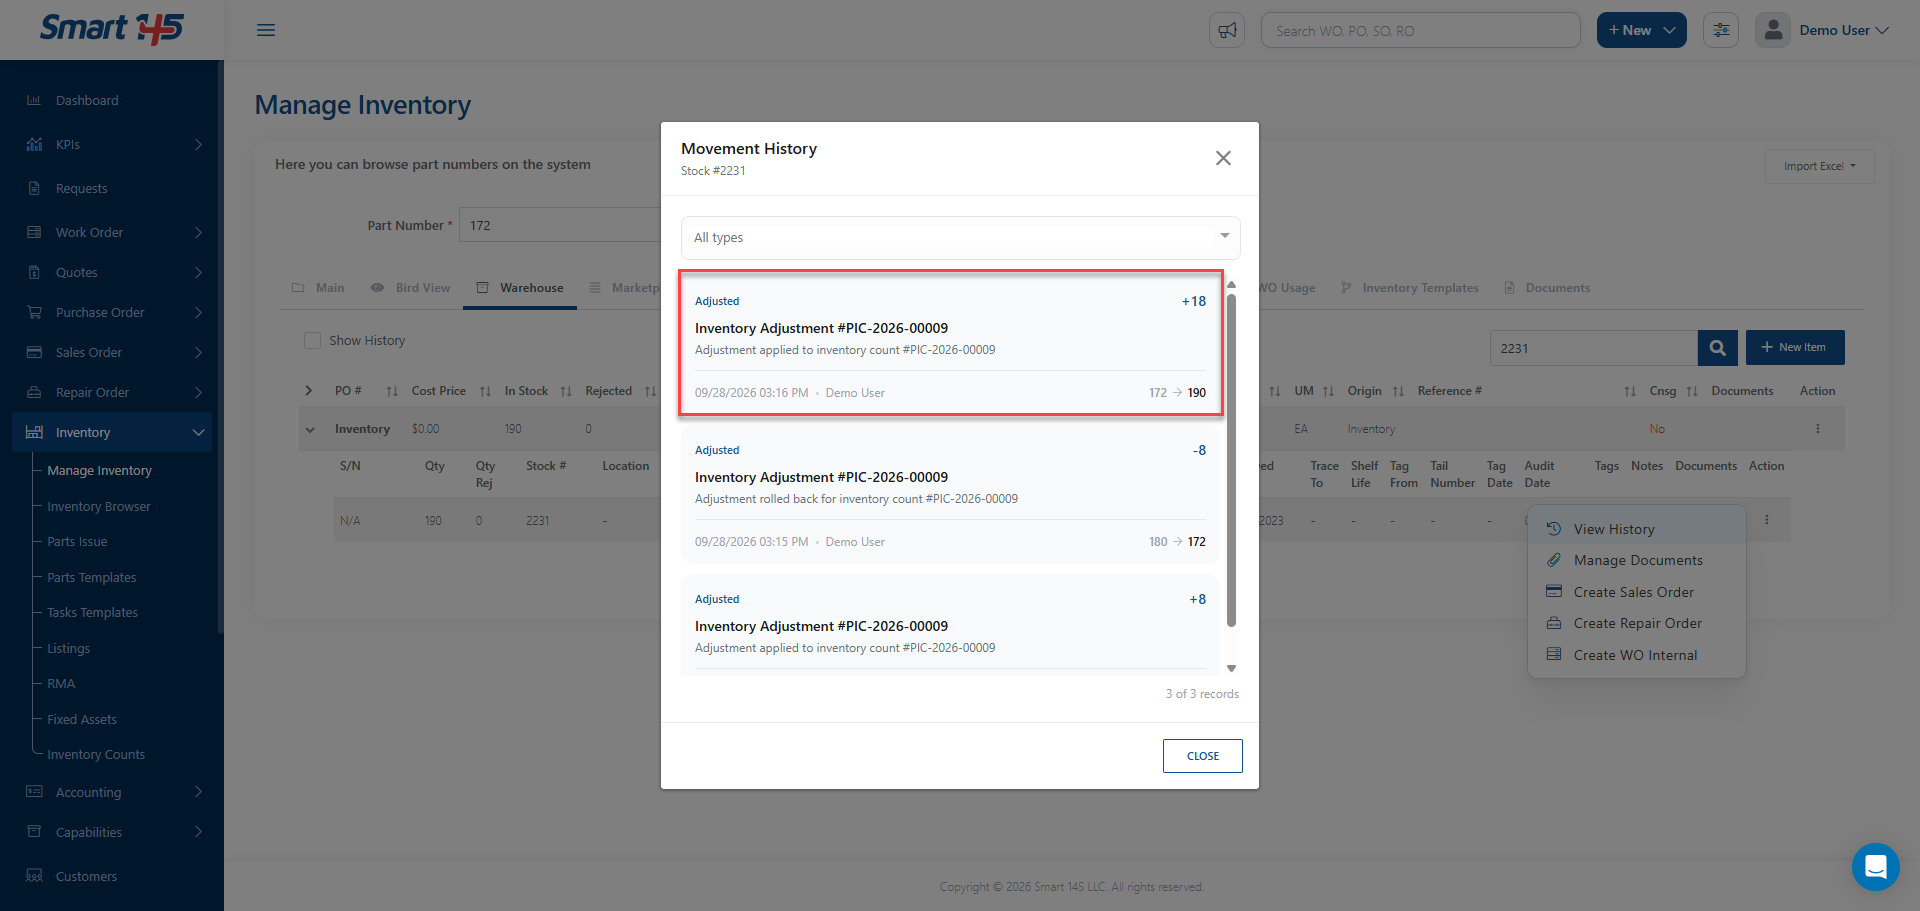
4- Adjusting Inventory After completing the physical count and reviewing the differences, users can proceed with the inventory adjustment to make the system quantities match the quantities physically found. After applying the inventory adjustment, the system inventory for that PN will be updated to the Scanned Qty. If a Scanned Quantity that was previously entered needs to be changed, the existing inventory adjustment must first be reverted. For example, if an item was previously scanned and adjusted to a certain quantity, but a subsequent physical count finds additional units of that item, the existing adjustment must be reverted. Once the adjustment is reverted, the Scanned Qty field for that item in the Discrepancy section will become editable again, allowing the user to enter the new physically scanned quantity. Once the new Scanned Qty has been entered, the inventory adjustment can be applied again so that the system inventory is updated to reflect the new physical quantity.