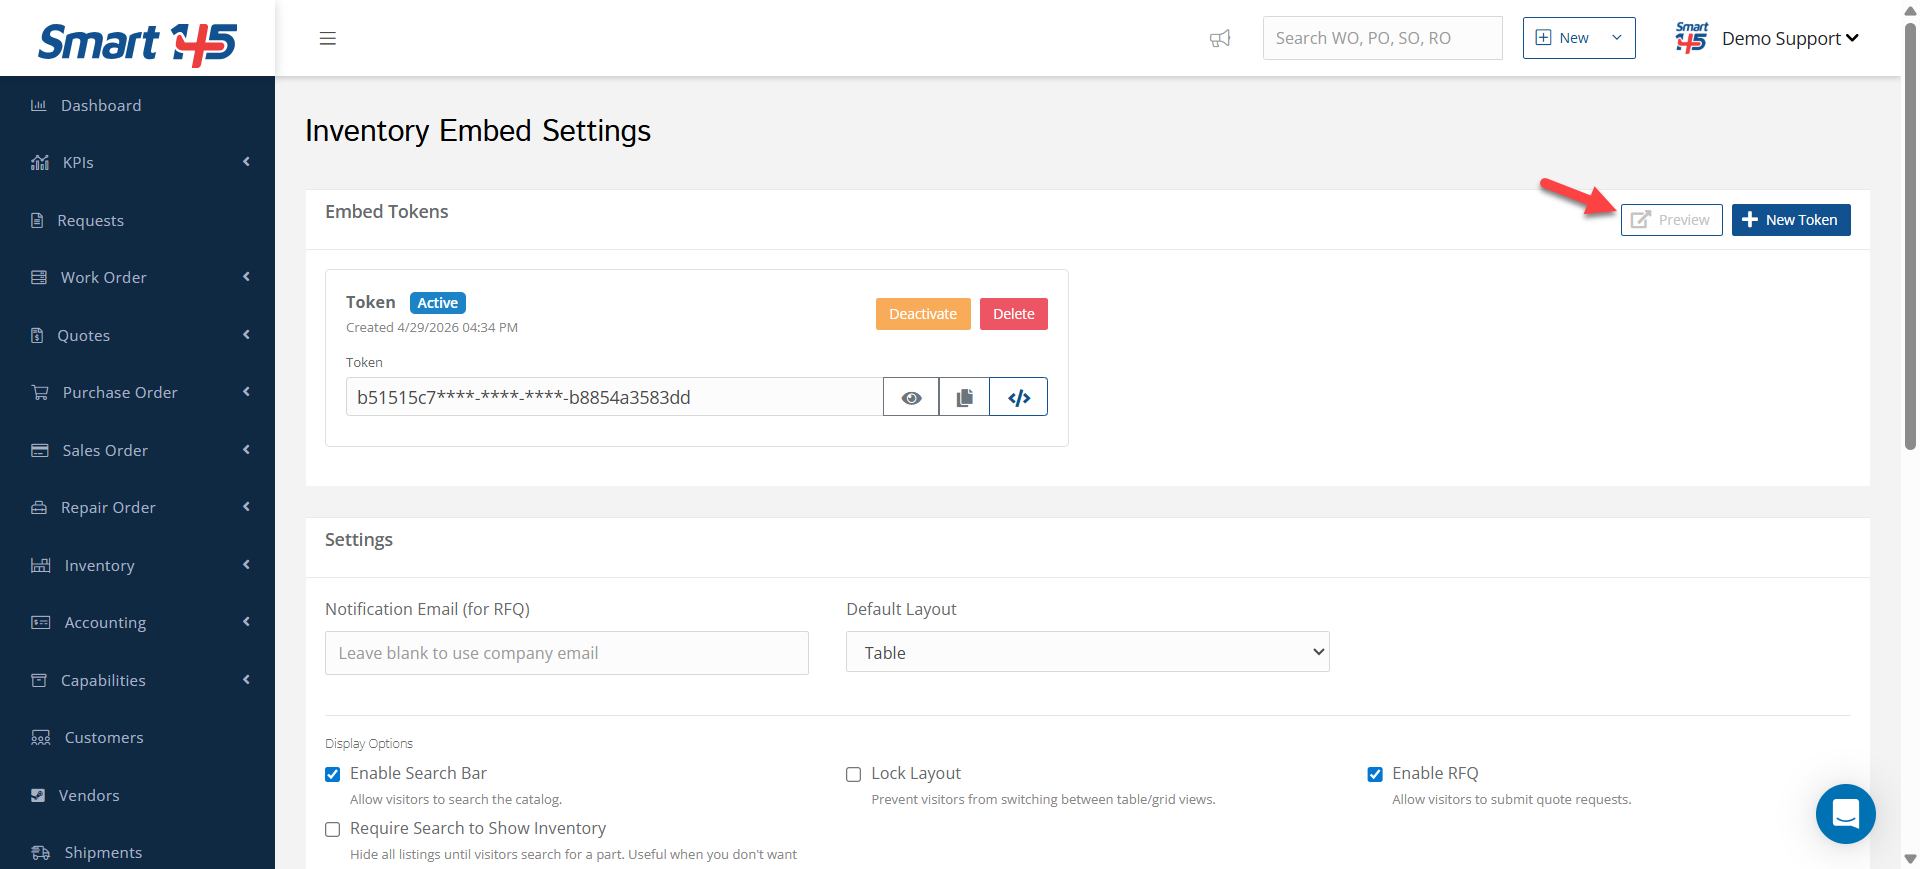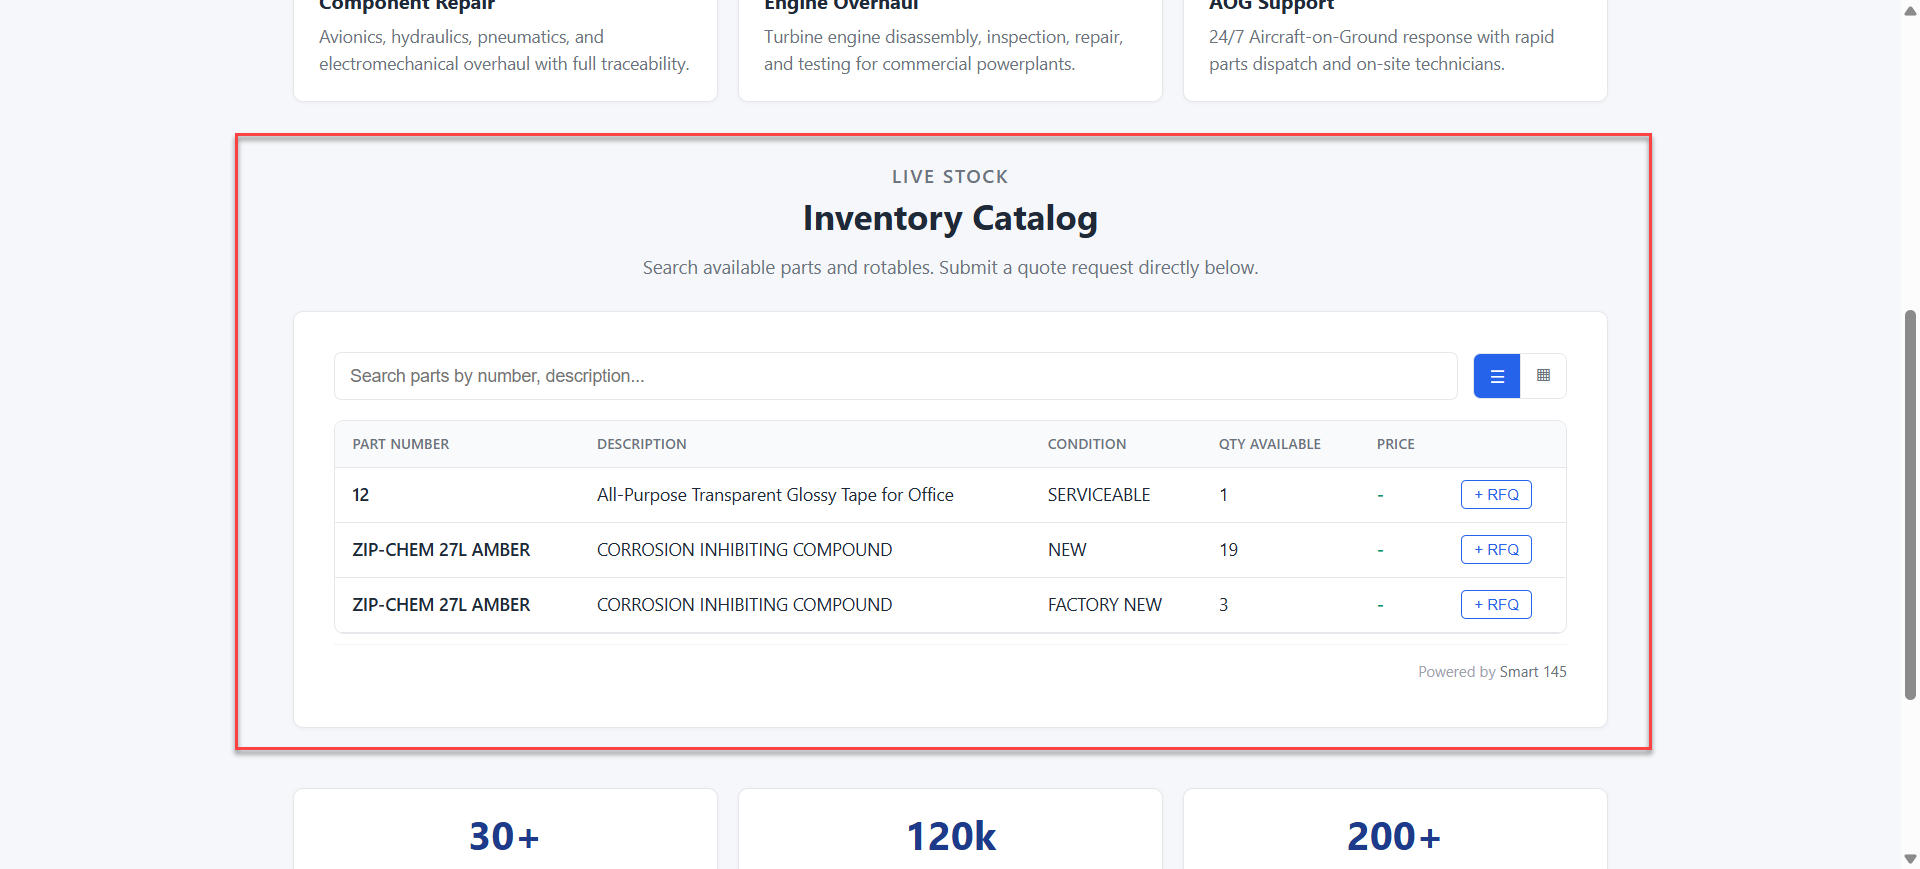
You can turn your Smart 145 inventory into an external catalog that your customers can access on your website. To do this, follow the steps below.
Step 1: Prepare Your Inventory
Step 1: Prepare Your Inventory
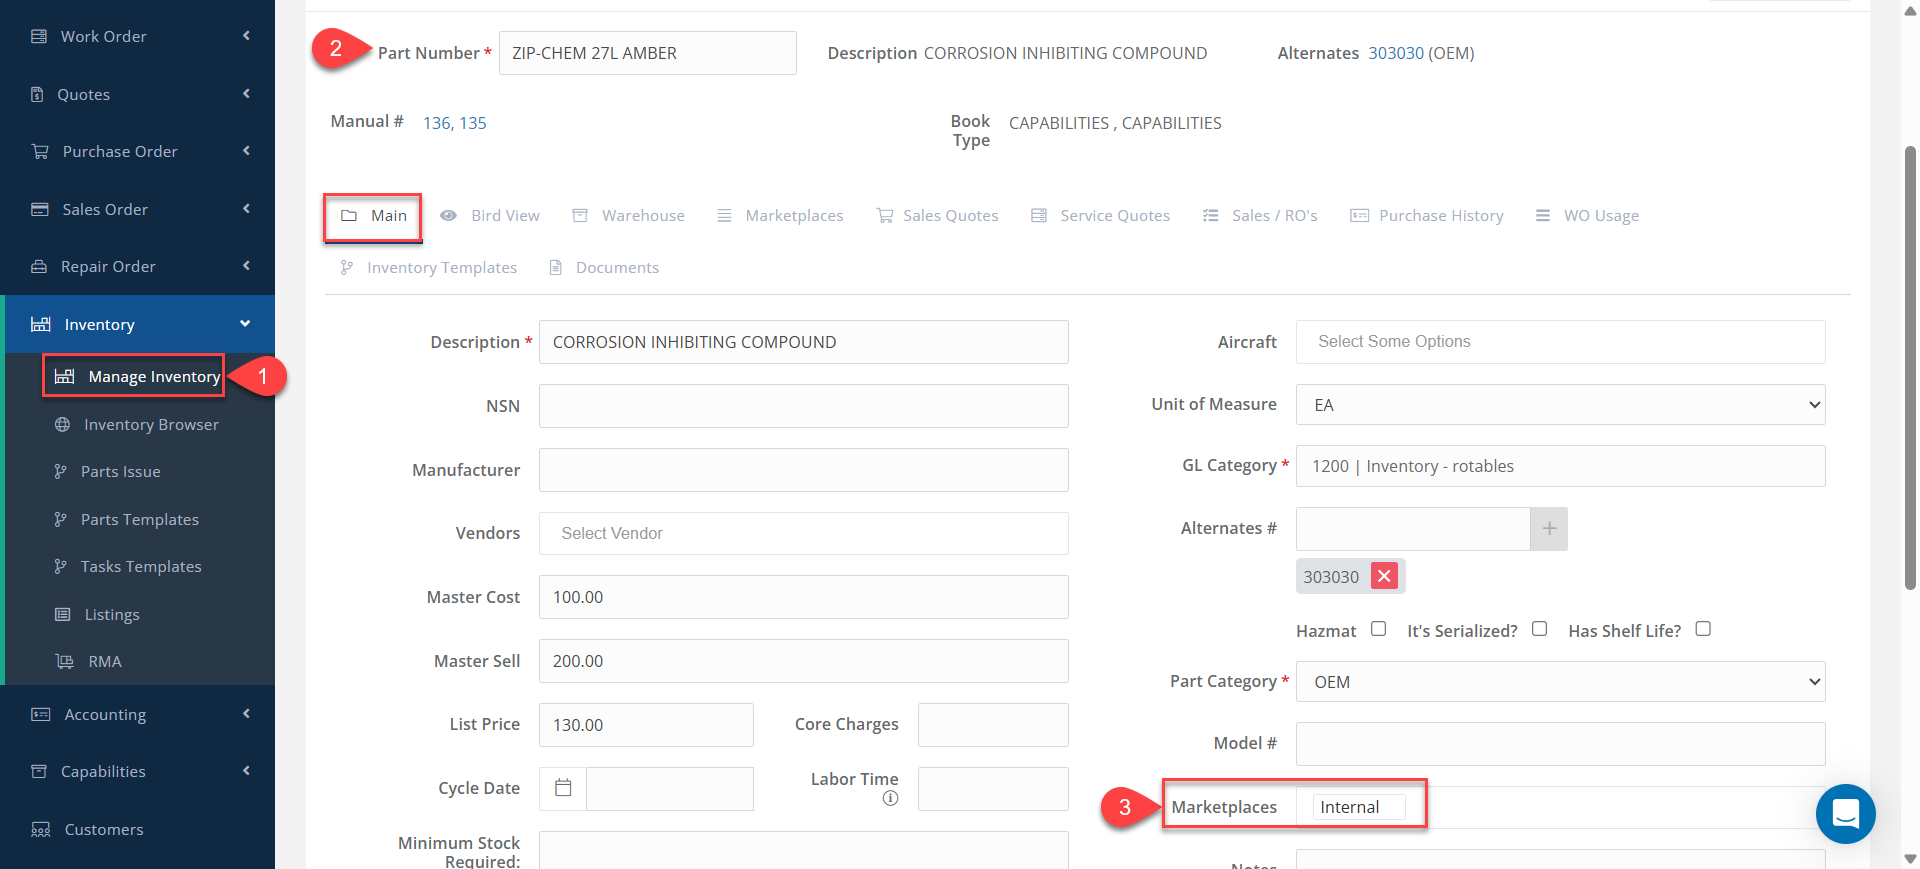
- Go to the Manage Inventory main tab.
- Locate the parts you want to include in your catalog.
- Mark those parts as Internal.
- Alternatively, you can send us a list of parts, and we can mark them for you
Step 2: Create a Listing
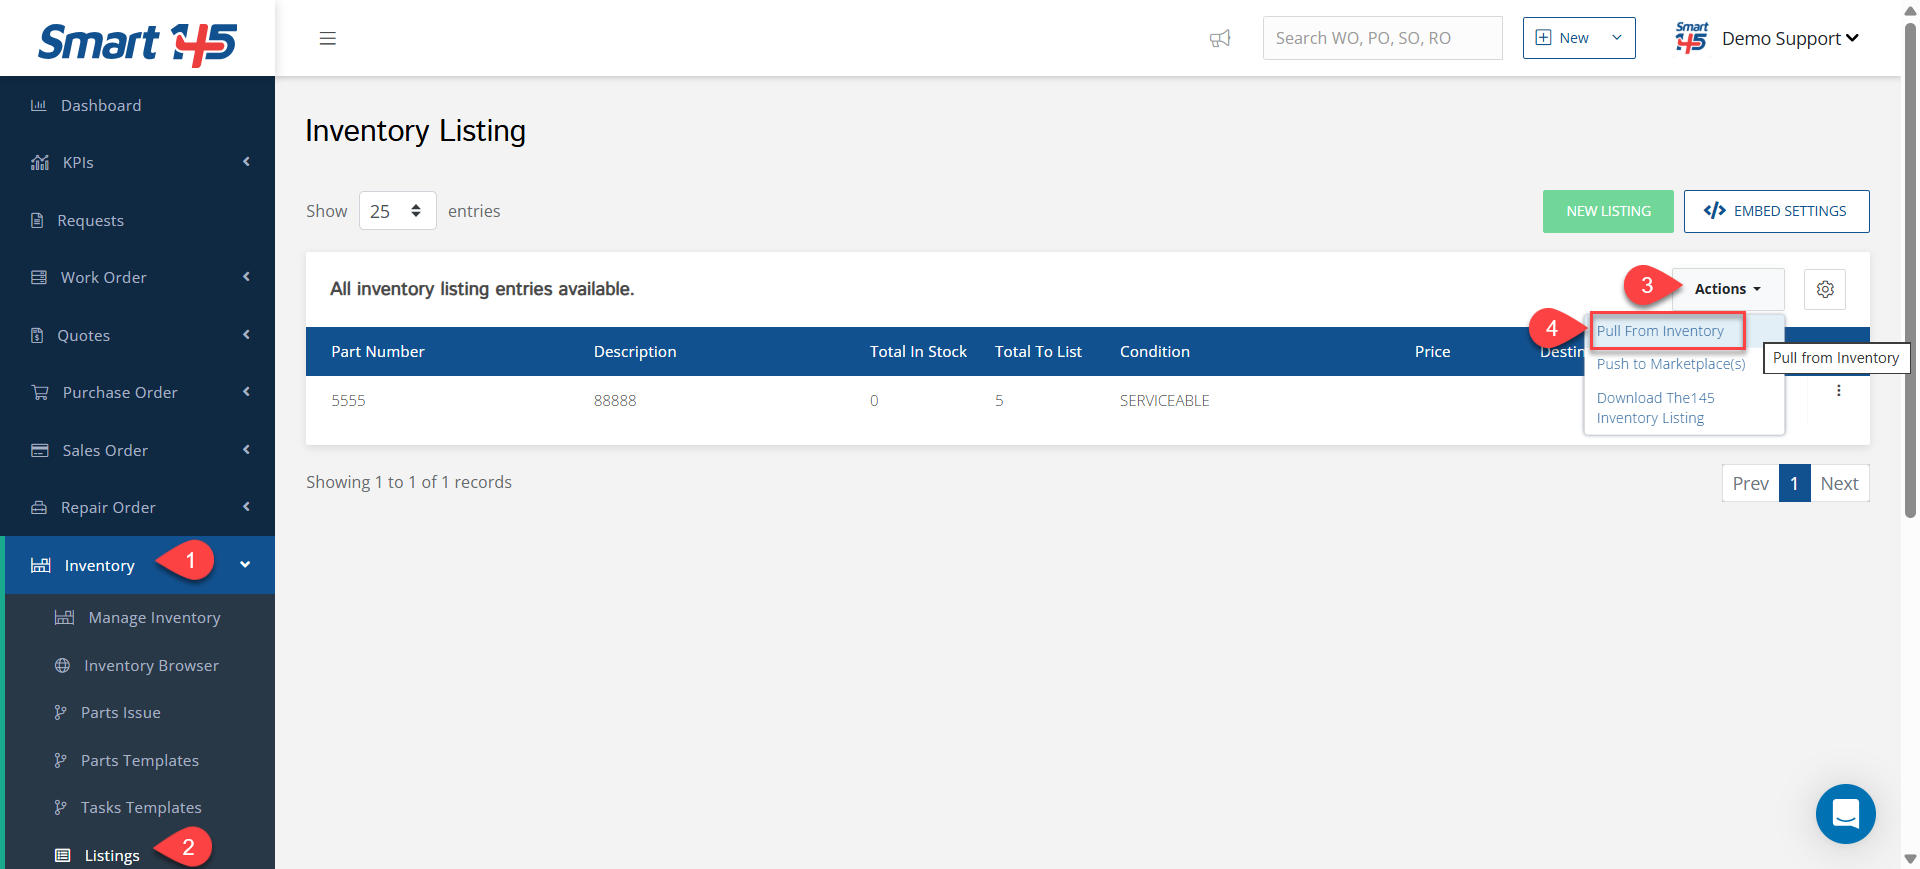
- Navigate to Inventory → Listings.
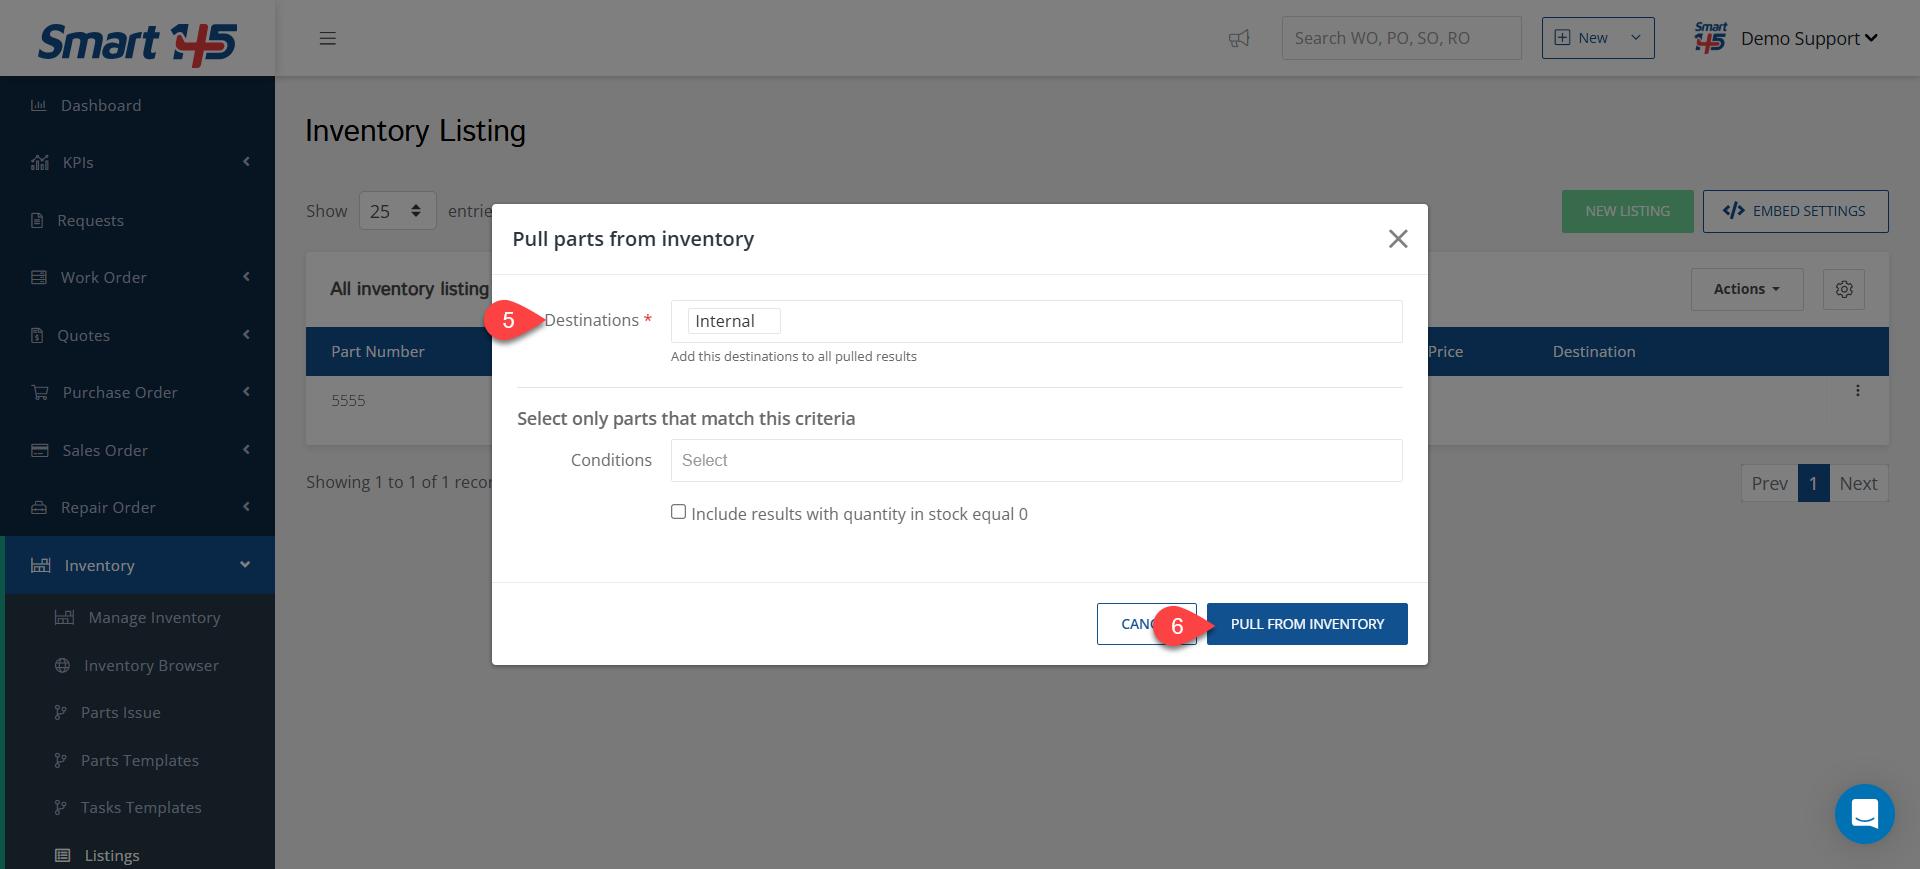
- Use the Pull from Inventory option to import the parts you marked. Make sure you select "Internal" as the Destination you are pulling from.
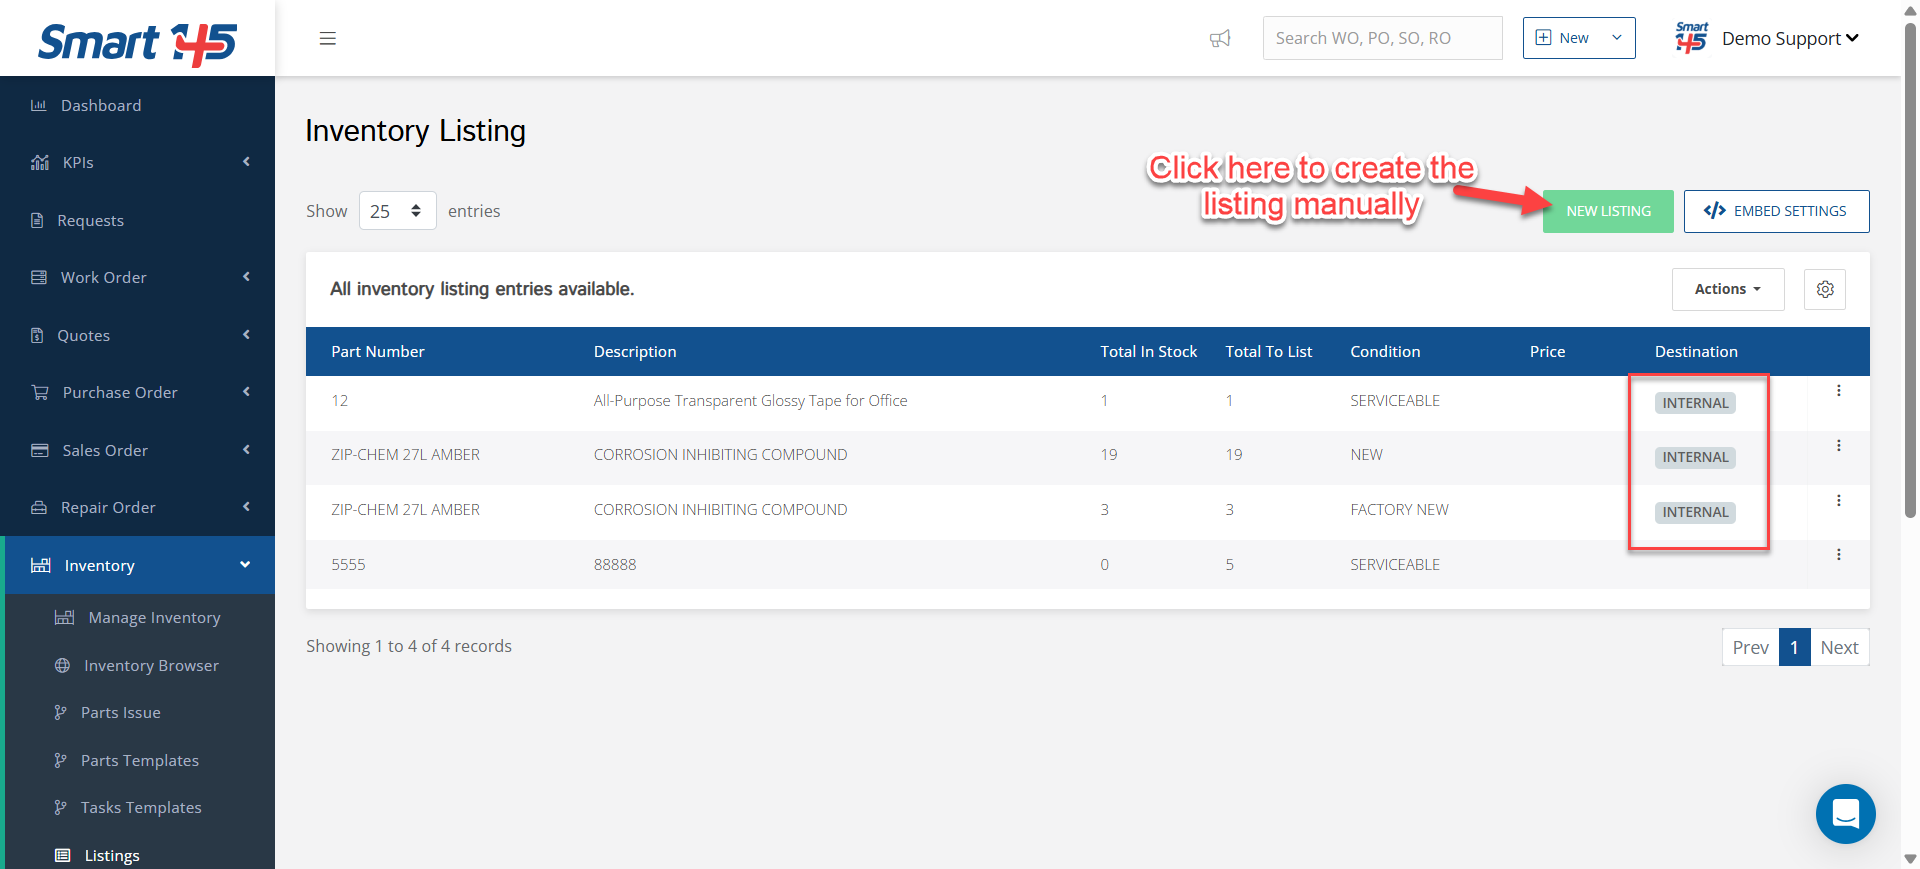
- This will generate the list of items that will appear in your catalog.
- Alternatively, you can click the option New Listing to create the Listing manually instead of pulling it from Inventory
Step 3: Generate an Embed Token
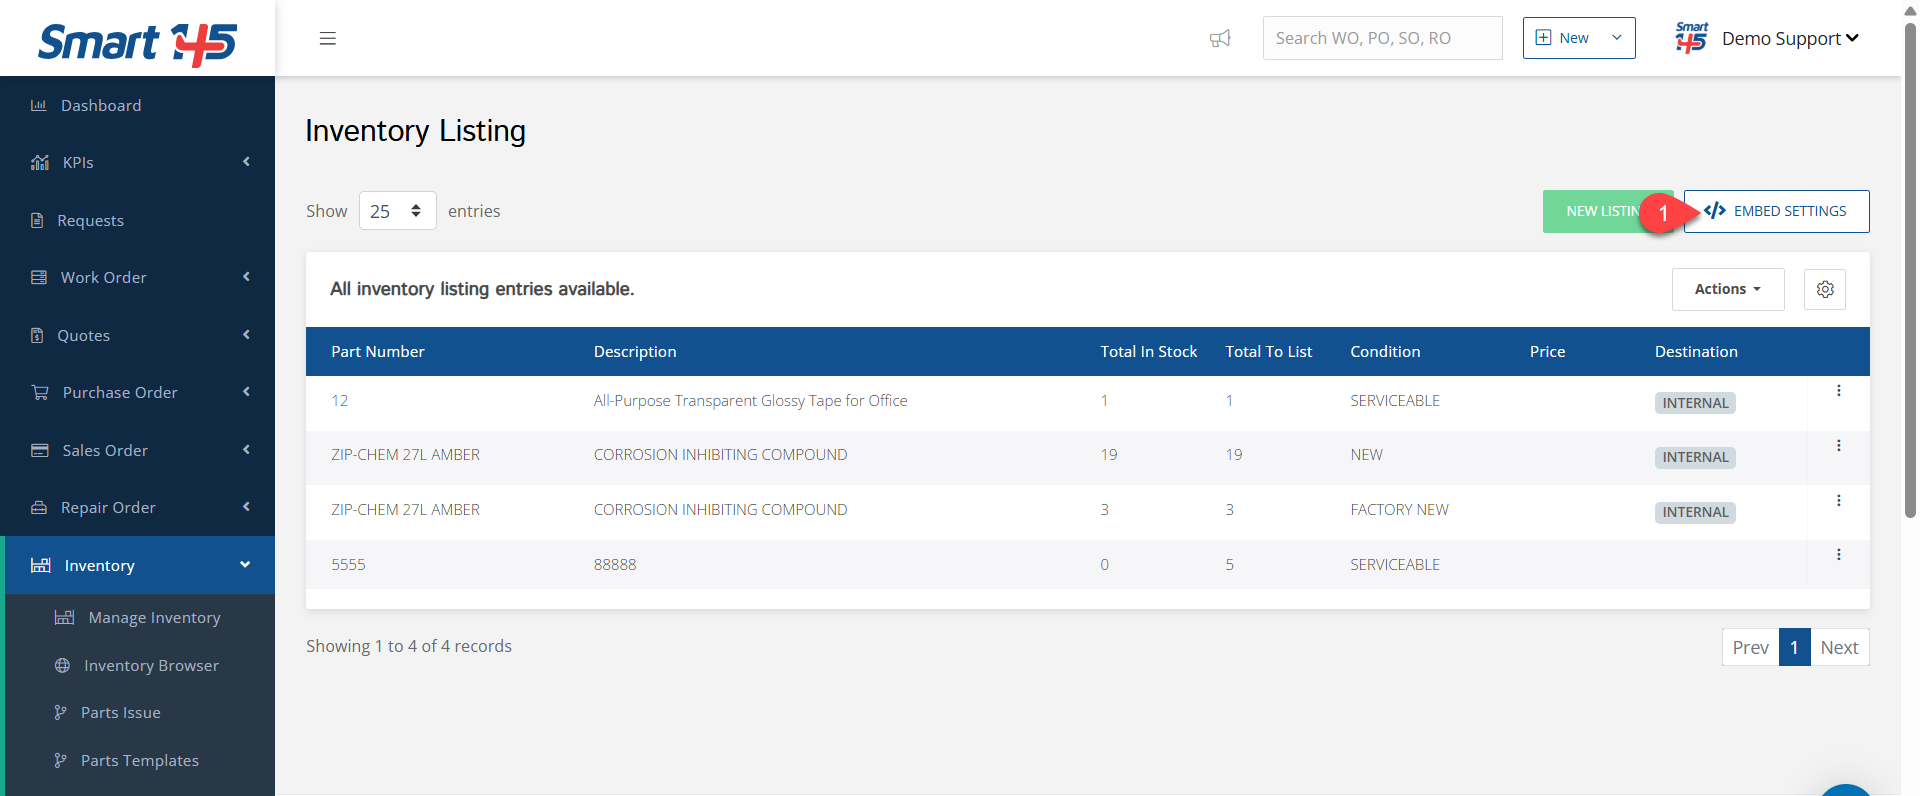
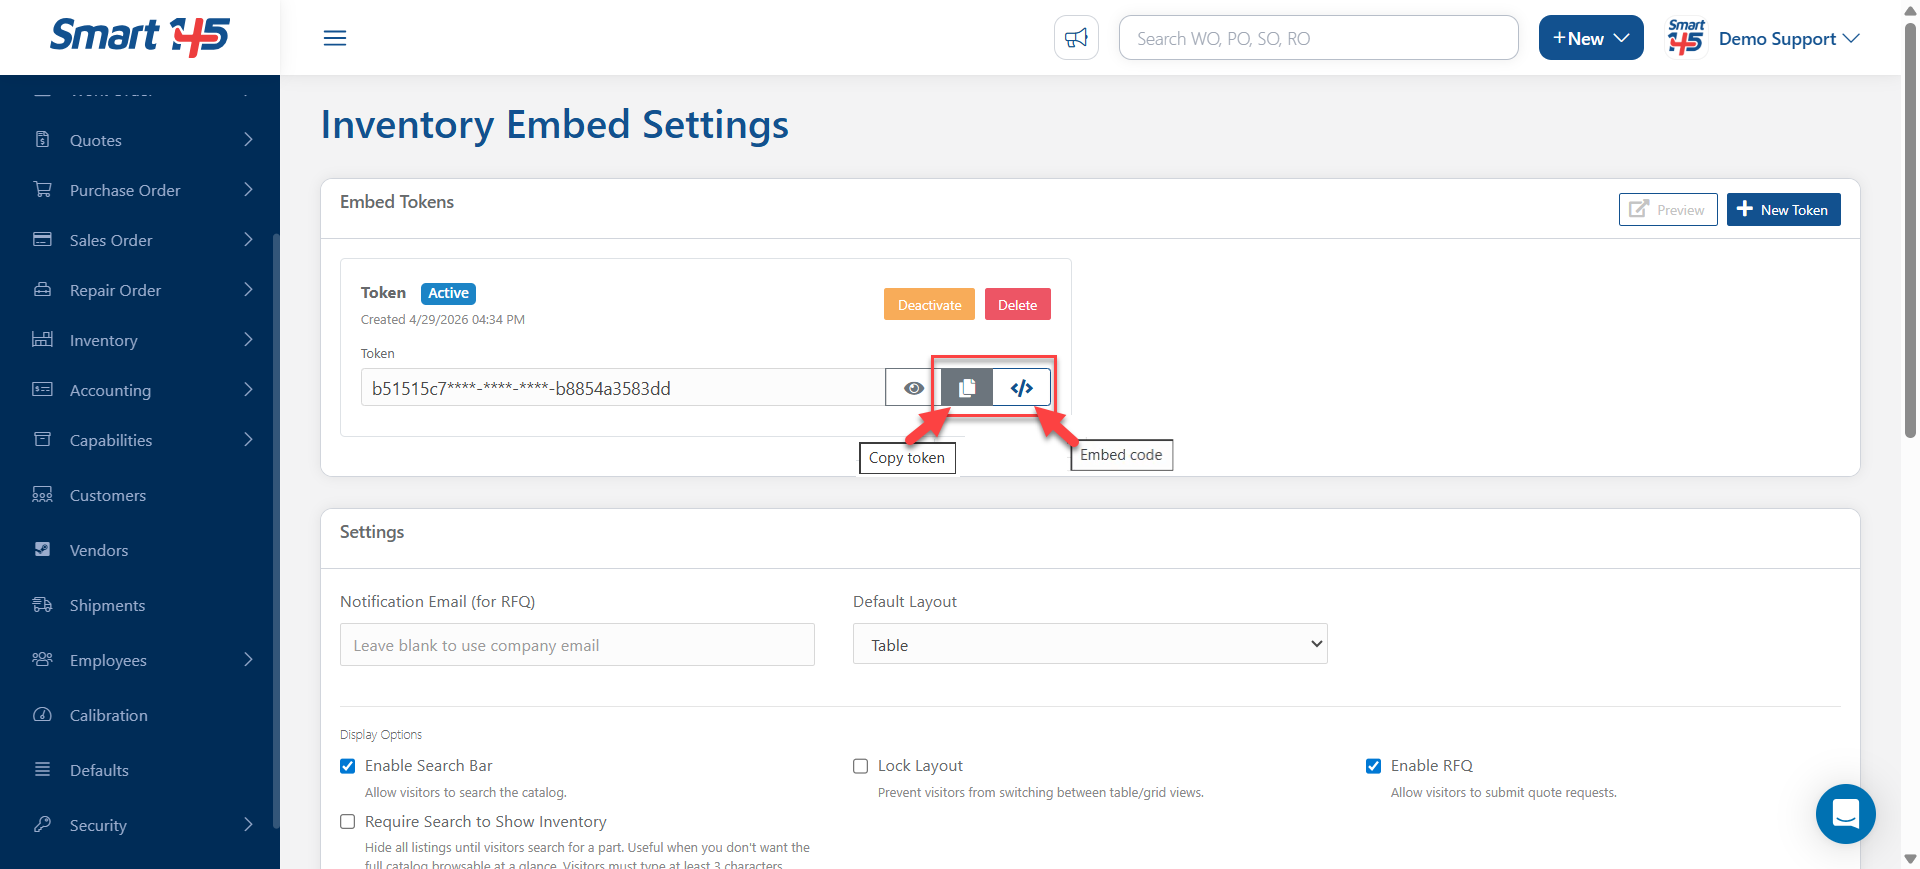
- Go to Embed Settings.
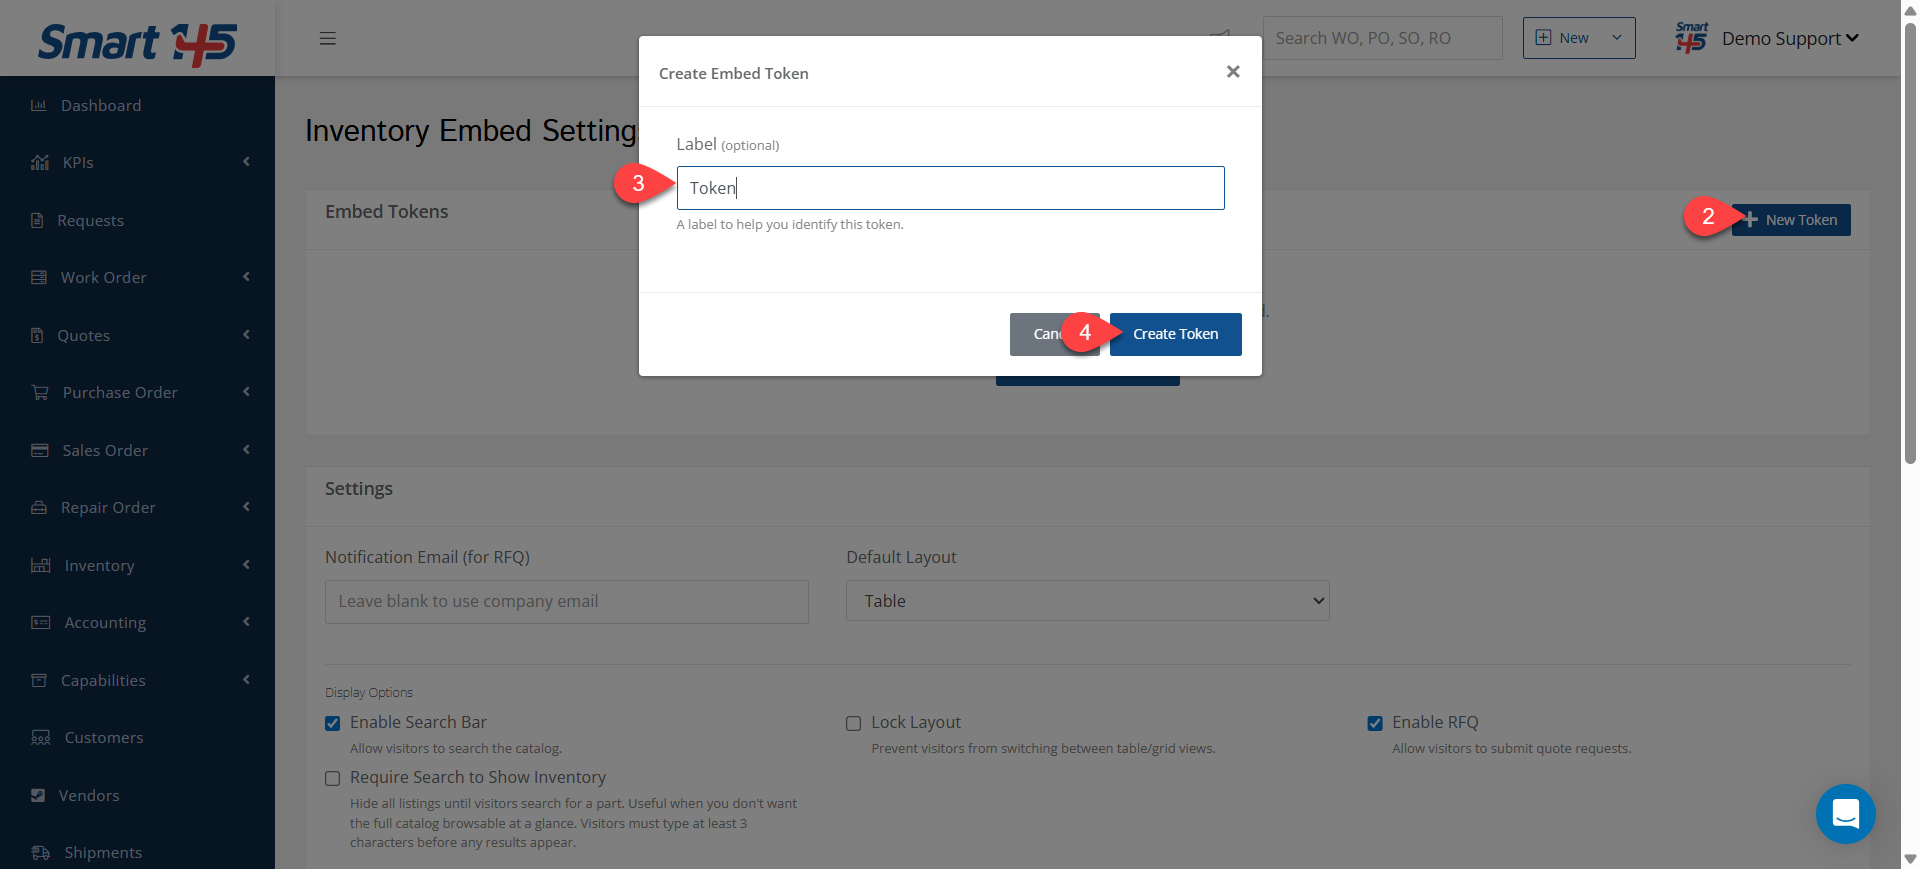
- Create a Token.
- Use this token and the embed code to embed the catalog on your website.
Step 4: Customize Your Catalog
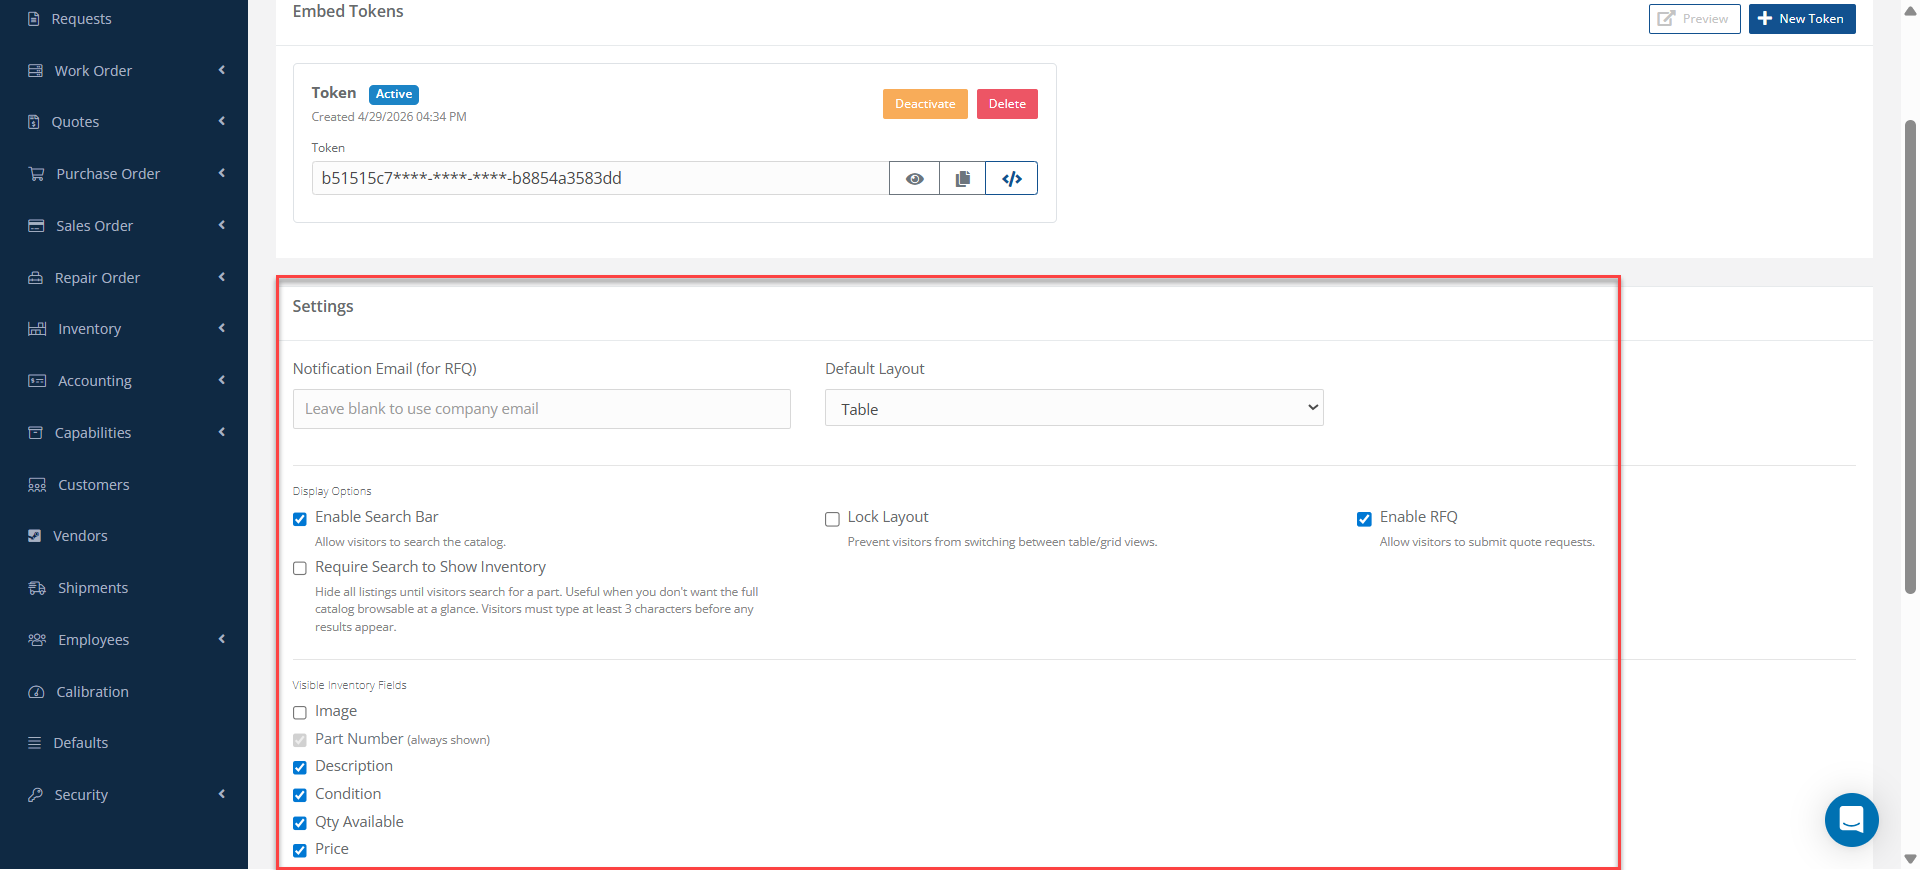
Within the embed settings, you can configure several options to tailor the catalog to your needs:
Settings
- RFQ Settings: Choose the email address where you want to receive Requests for Quotation (RFQs).
Display Options
- Default Layout: Choose if you want your catalog to be shown as cards, as a table, or if you want your customers to be able to decide.
- Search Options: Enable or disable the search bar.
- Inventory Visibility: Show all available parts, or display only results based on customer searches.
- RFQ Functionality: Allow or prevent customers from submitting RFQs.
Visible Inventory fields
- Select which details to show, such as price, condition, part images, etc
Advanced Customization
If you have technical experience, you can further customize the appearance of your catalog by adding your own CSS in the provided field.
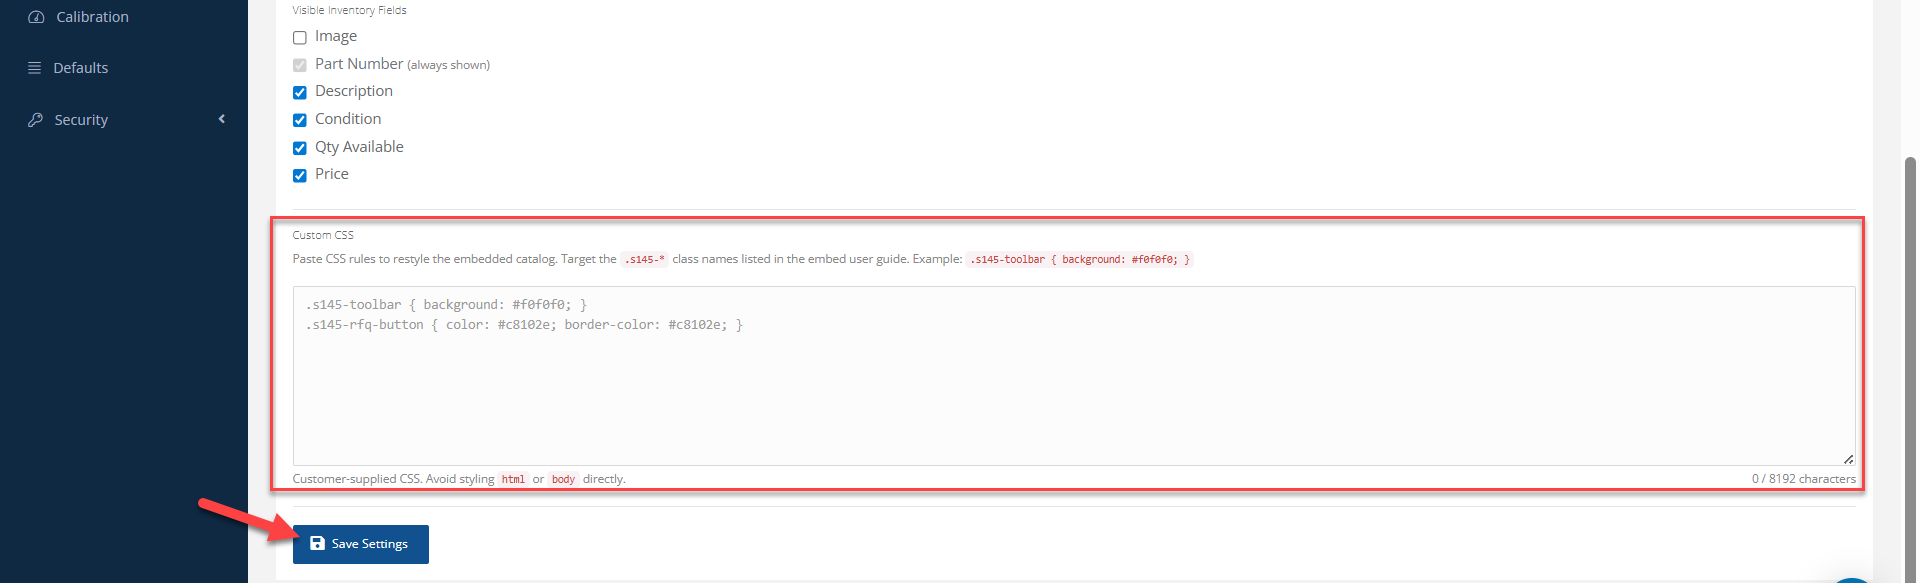
Finally, you can scroll to the top of the page and click Preview to see how your catalog will appear.